OBS scene selector with Python Script
You don't need a stream deck to switch scenes in OBS or a special dedicated app. I'll show you how to create a python script and use your own keyboard

Contents
Table of contents
- YouTube video
- Introduction
- Pre-requisites
- OBS WebSocket
- 1password cli
- Python script
- Switch using keyboard shortcuts
- Other videos mentioned
- Community-driven promotion
- You’re a fraud, why do you ask for money, isn’t YouTube Ads enough?
YouTube video
Introduction
Yes, there are many different ways to control OBS, I wanted a way to be able to control it using keyboard shortcuts. I didn’t want to use dedicated hardware like a stream deck, and I didn’t want to use an app on my phone.
My macOS workflow is very keyboard centric as I use keymaps for basically everything, so I wanted a solution that allowed me to switch scenes without even thinking about it or looking at another device.
- For example, if I want to switch to:
- Guest 1 screen, I type
hyper+o+1 - Guest 2 screen, I type
hyper+o+2 - Guest 3 screen, I type
hyper+o+3 - Starting soon screen, I type
hyper+o+s - My main screen, I type
hyper+o+m
- Guest 1 screen, I type
In this video you will learn how to use the 1password CLI to store secrets that you can query from a script so that you’re not hard coding those secrets in plaintext in your code.
I’ll show you how to connect to the OBS WebSocket server using Python, authenticate securely with a password stored in 1password, and switch scenes with a simple CLI script. No GUI needed, no mouse, no phone app, and definitely no stream deck.
This setup works locally, stays secure, and is fast. You’ll see how to install 1password-cli, generate secret references, authorize them, and trigger scene changes through Python.
Perfect for streamers, macOS power users, and developers who want a minimal and secure OBS automation setup without relying on third-party tools or extra devices.
Pre-requisites
- I’m on macOS, if you’re on Windows stuff may vary a little but it should remain very similar
- Otherwise, hopefully a Windows user can help out in discord
- If not, I would strongly recommend you to read the documentation
OBS WebSocket
- The official WebSocket documentation can be found here:
obs-websocketis now included by default with OBS Studio 28.0.0 and above- Notice on the image below I’m using 31.0.2
- You can enable or disable authentication and set a password for it
- I will enable authentication and the script will retrieve the password from
1password, but the script also works with authentication disabled. I’ll demo how
- I will enable authentication and the script will retrieve the password from
- In OBS
Tools - WebSocket server Settings - Enable WebSocket server Settings - Notice port used
4455 Enable Authenticationis checked- Specify your password
Apply
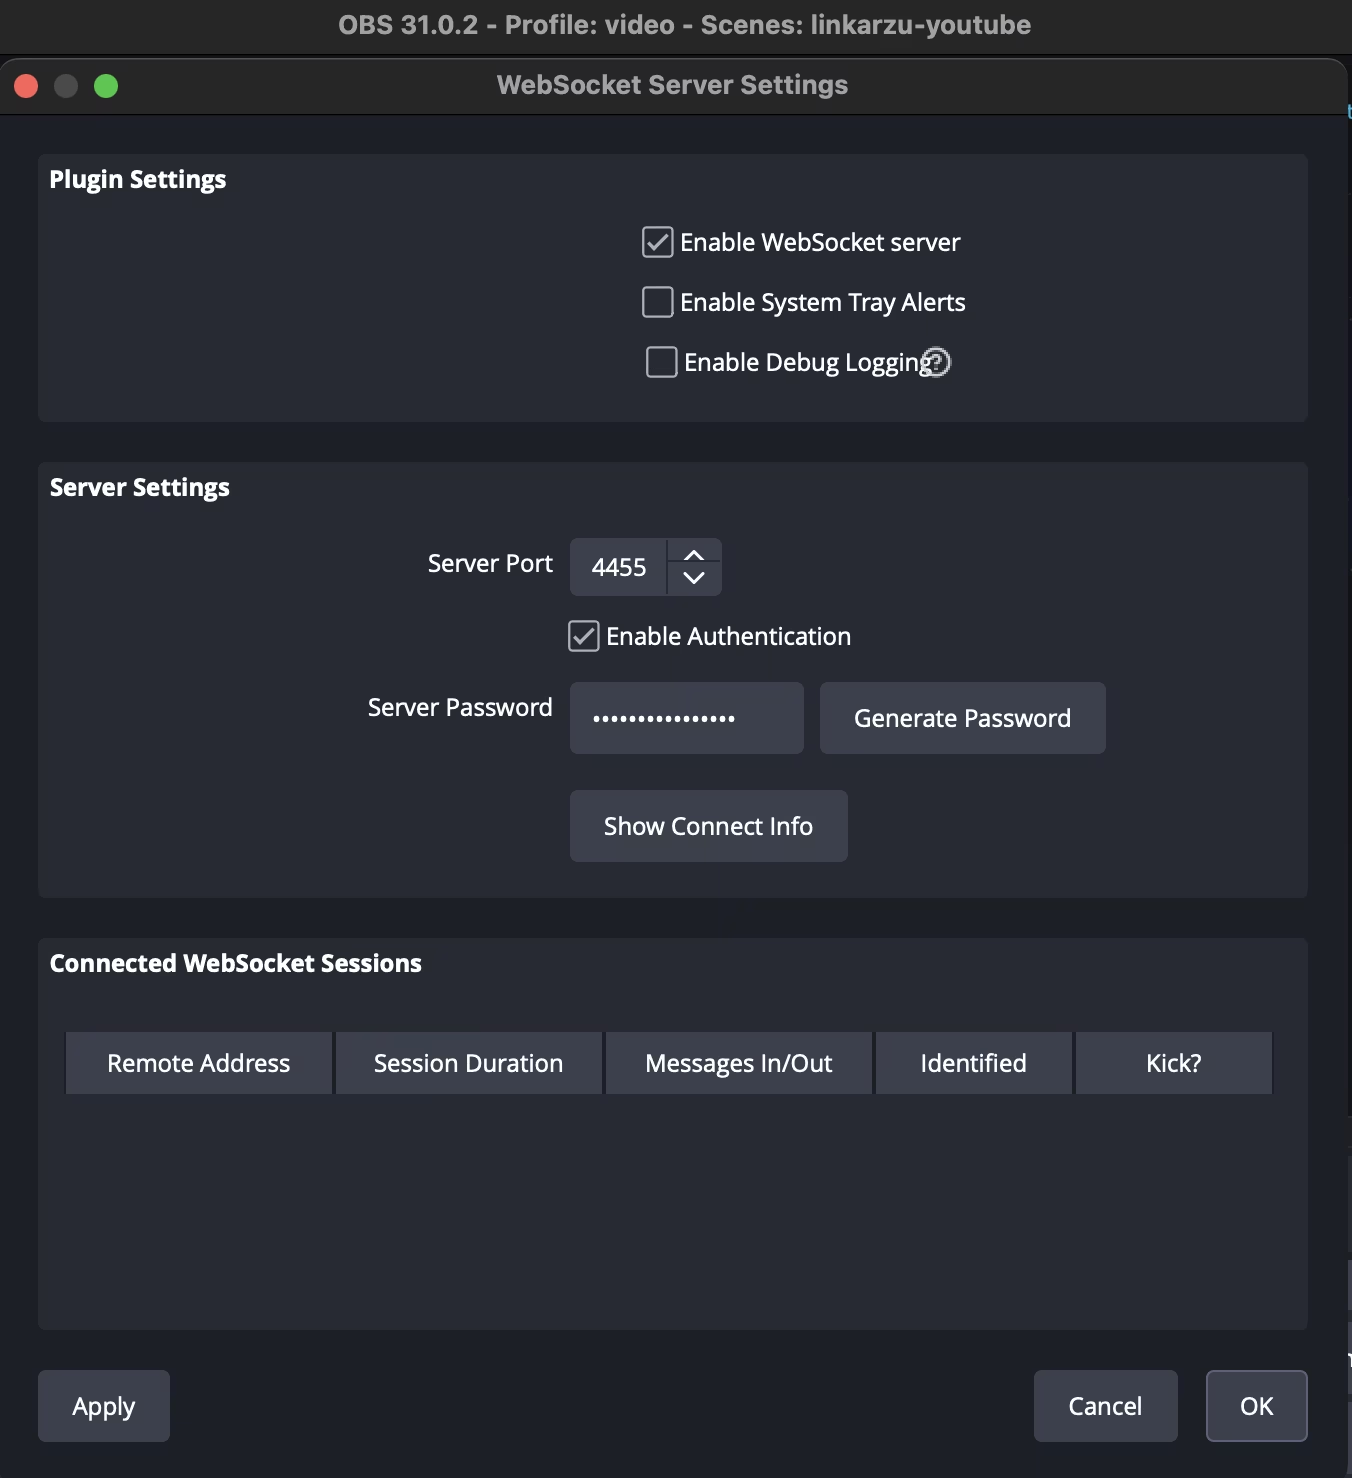 OBS WebSocket server settings
- In the WebSocket documentation you’ll be able to find the
Client libraries (for developers)section - There are several libraries, I’m using
obsws-pythonbut you could use a different one, and create the script inrustorgofor example - In the
obsws-pythonlibrary you will find the documentation and a link to the obs-websocket 5.x.x Protocol- Here you can find all documentation of the things that can be done with the
obs-websocketfor now I’m just changing scenes, but you can do everything listed in this file:- Create scenes
- Remove scenes
- Start a recording
- Stop a recording
- And way much more
- Here you can find all documentation of the things that can be done with the
1password cli
Authentication is optional in OBS, but I still have it enabled for security reasons. Otherwise:
- Anyone in your network can control your OBS
- Any malicious app or script on your computer could control it too
- Hopefully, you know what you’re doing and port forwarding is not enabled on your network, otherwise anyone on the internet could control it too.
- Will create a python script, this script will authenticate with OBS, and change the scene. To authenticate, the script will need the OBS password
- I will not hard-code the password in the python script, instead I’ll store it in 1password and retrieve the password from the script using the
1password-cli - Is this necessary?
- In the image below you can find a link to the documentation for the
installation instructions- If you’re on Windows, the installation instructions may be different, make sure to follow the documentation
- First, we will install through brew
1
brew install 1password-cli
- After installing, we click on the
Enable Integrationbutton
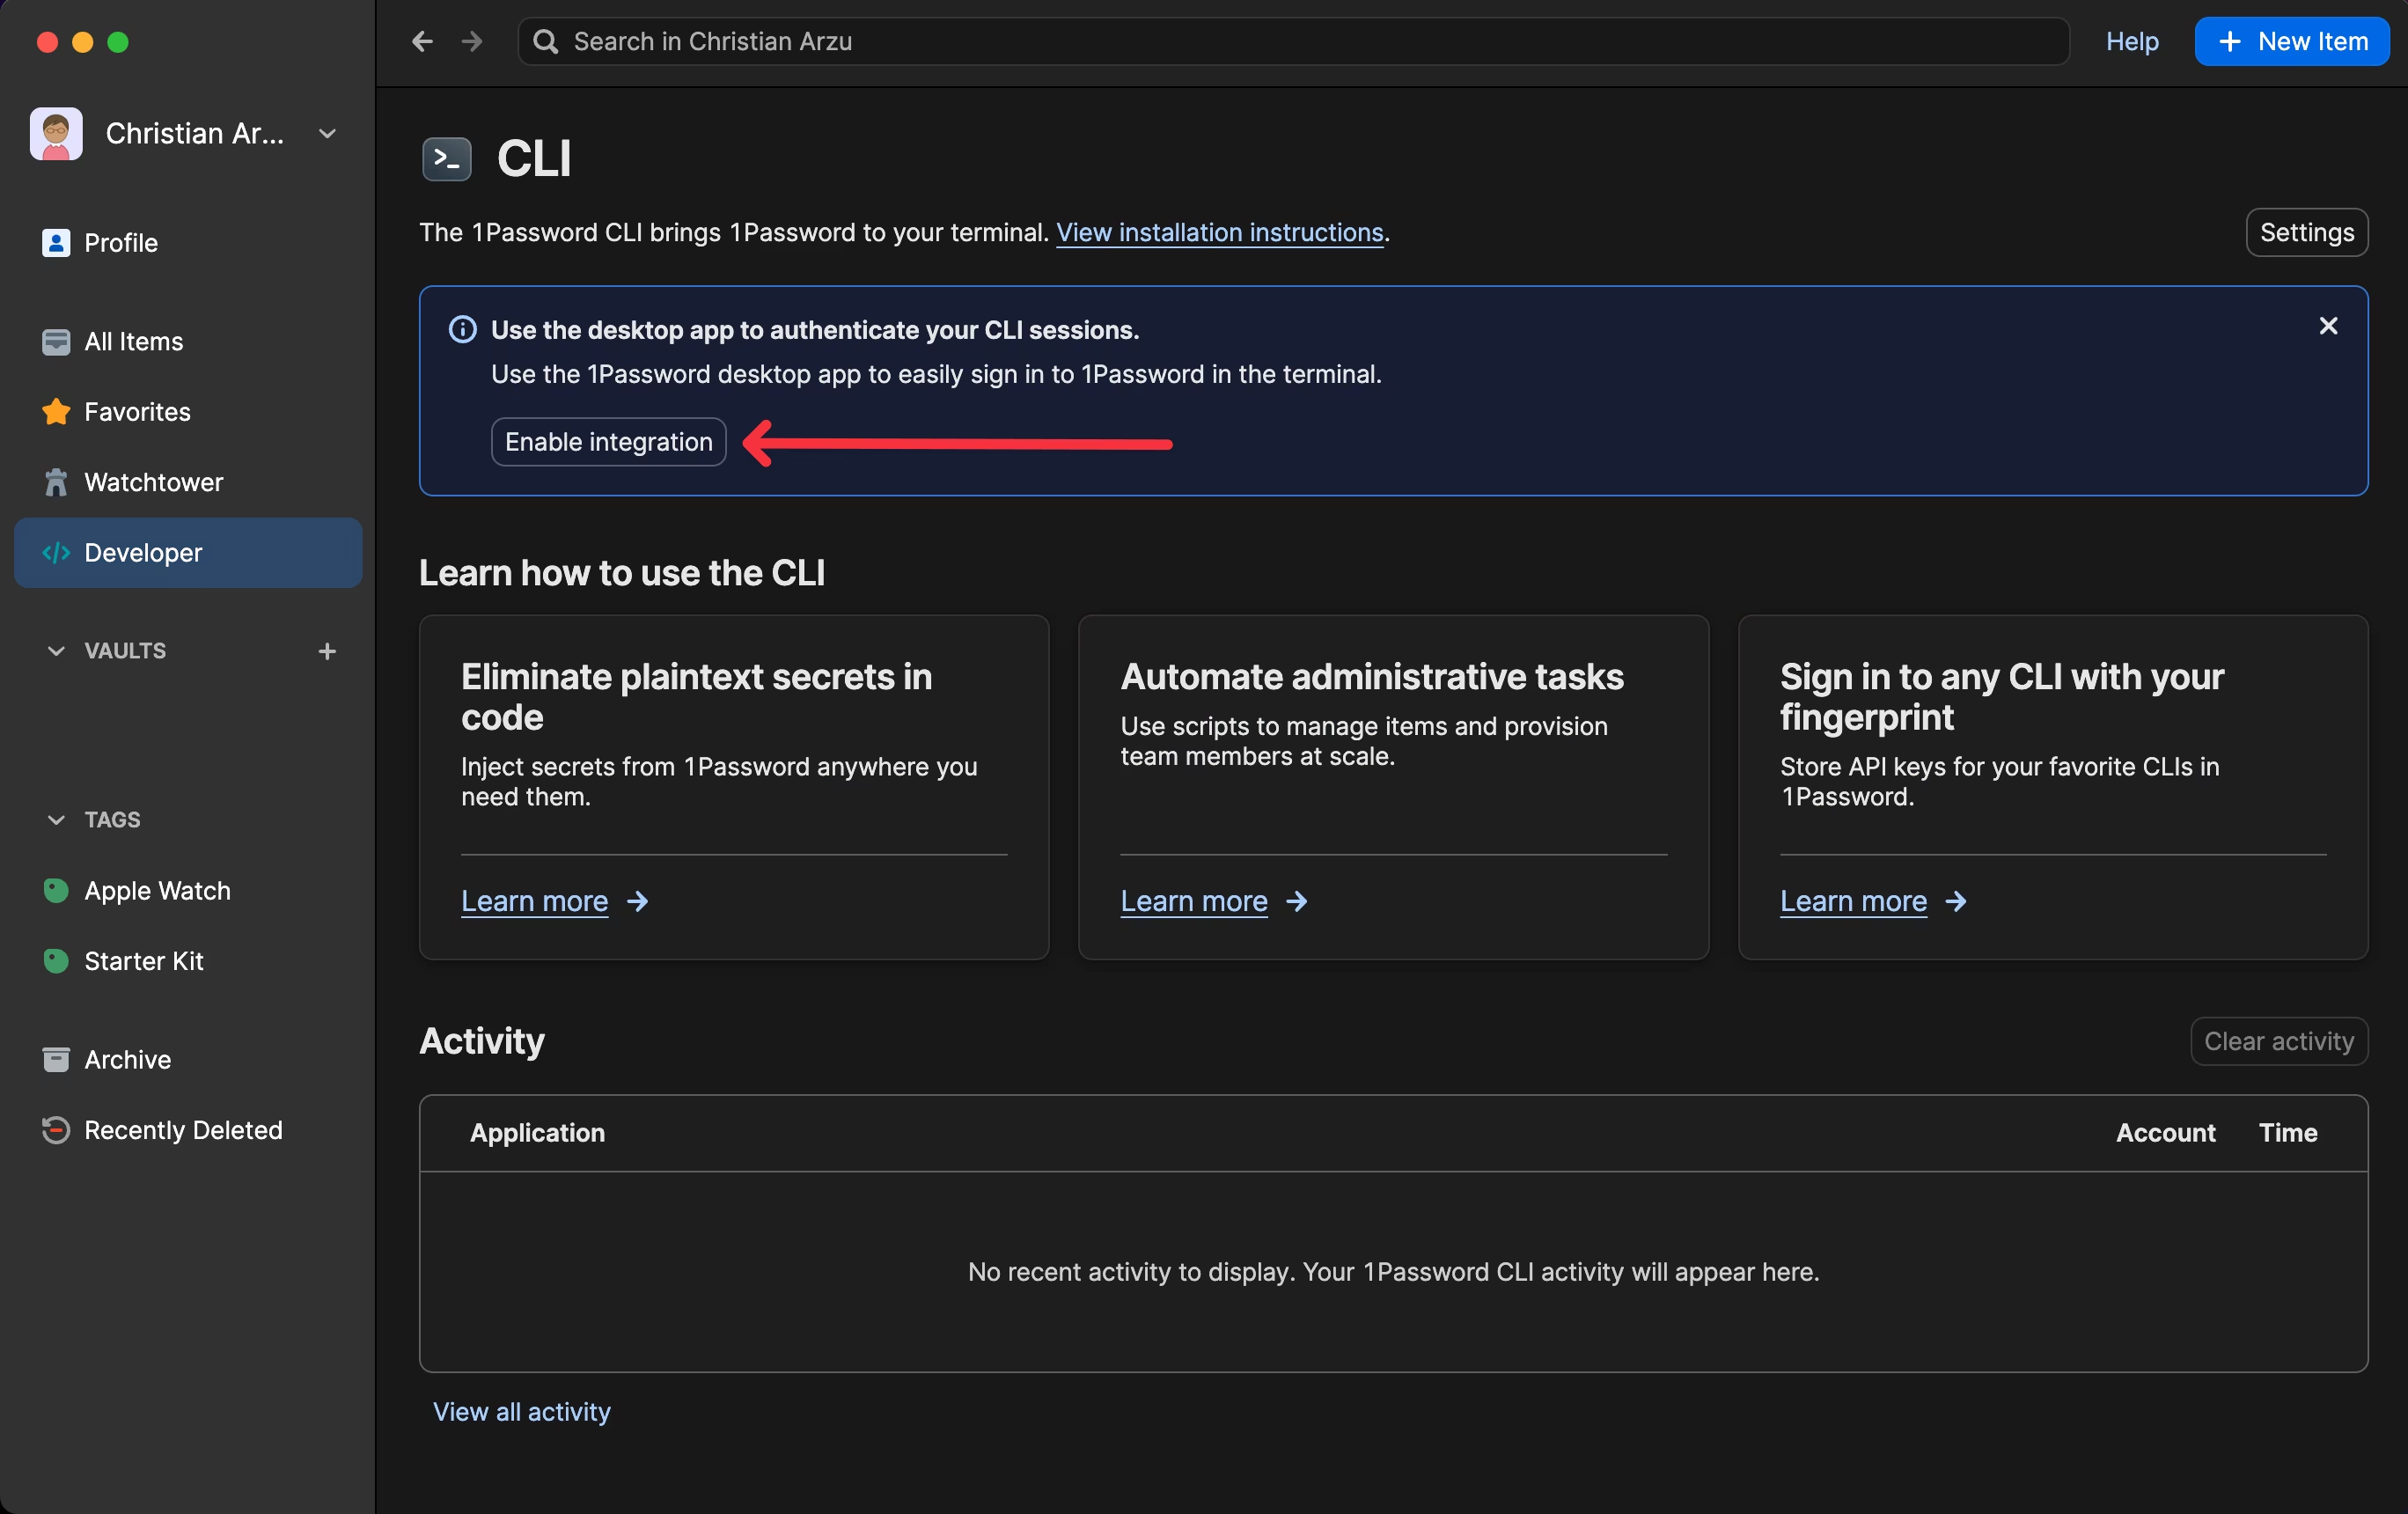 1st install, then click on enable integration
- This
Integrate with 1password CLIoption will be enabled
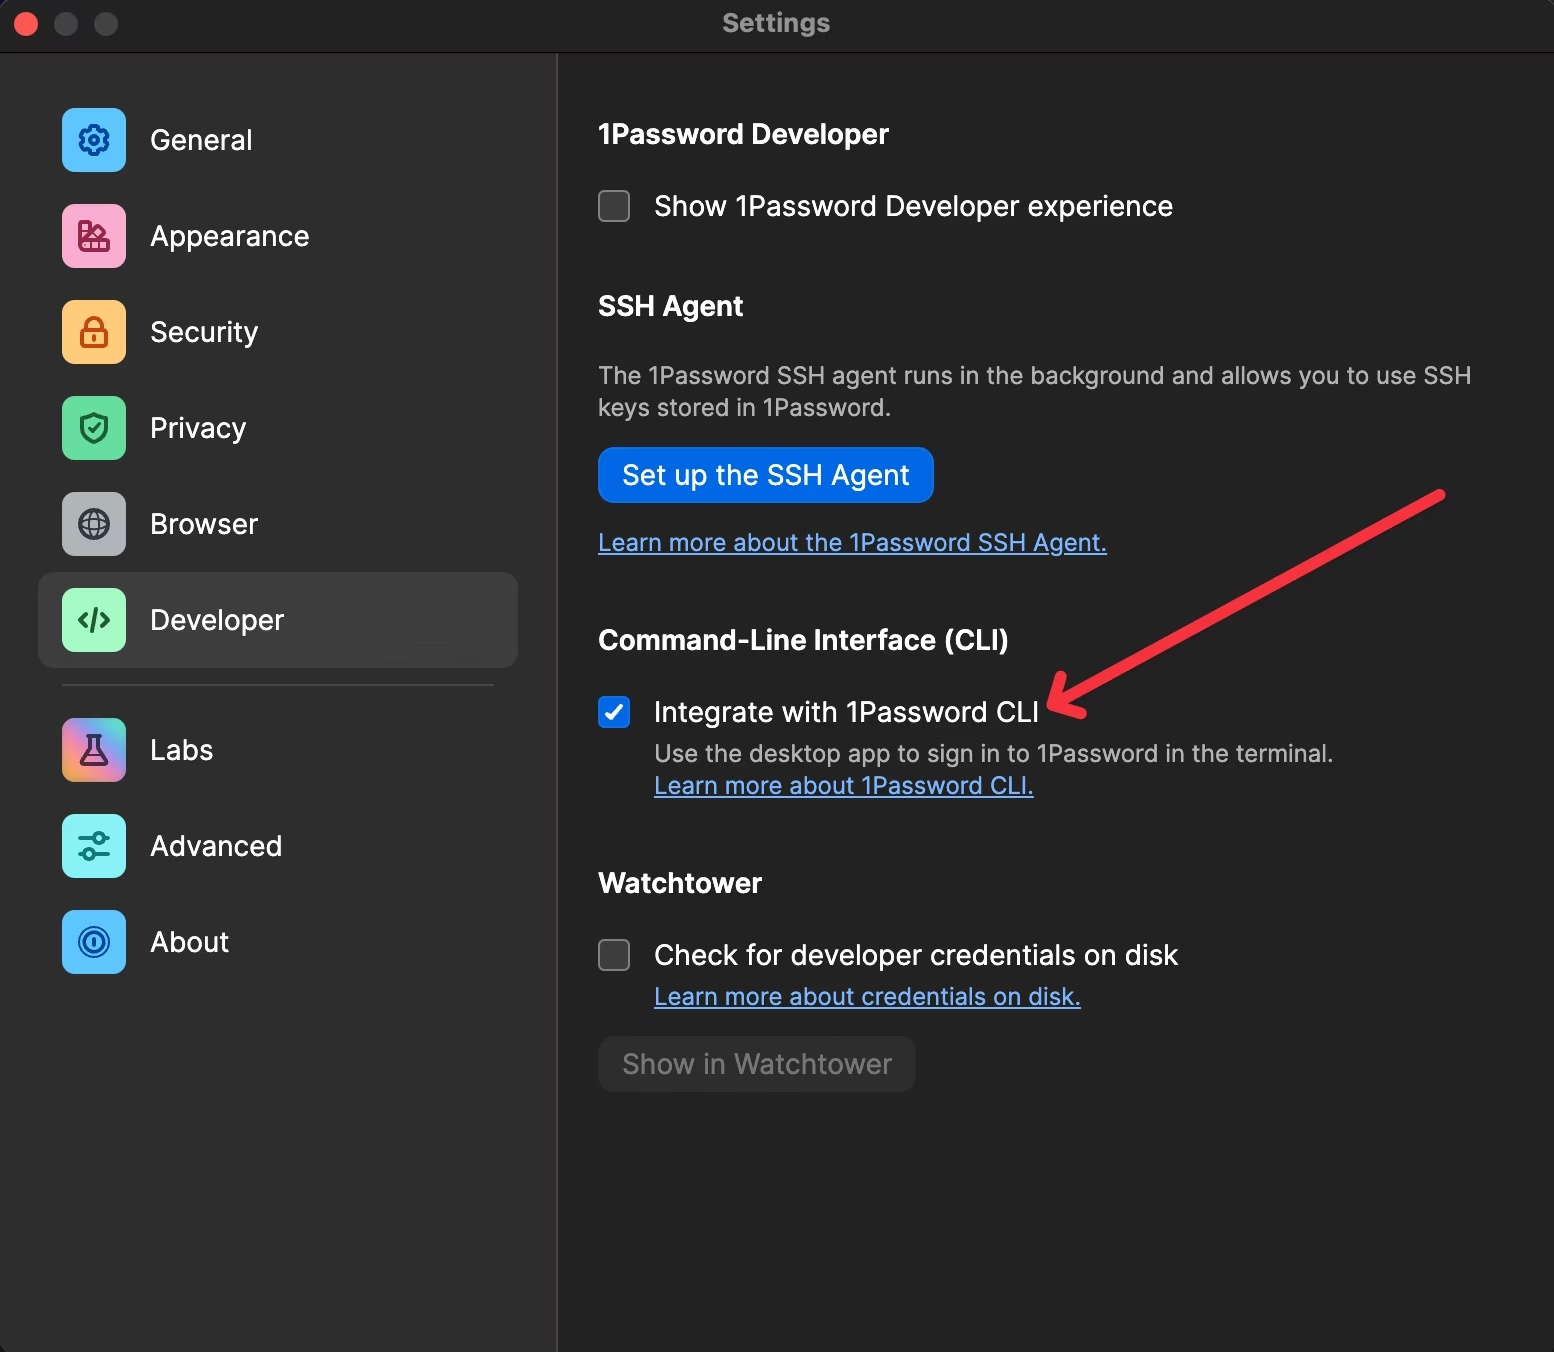 Integrate with 1password CLI
- Make sure it’s installed
1
op --version
1
2
3
4
linkarzu.@.[25/03/28]
~
❯❯❯❯ op --version
2.30.3
- Then we can enter
any commandto sign in, so we’ll read a secret stored in 1password - Right click the credential and
Copy Secret Reference
 Get the path for a secret
- Then let’s read the secret
1
op read "op://helixdeeznuts/test-api-credential/credential"
- You have to authorize the request
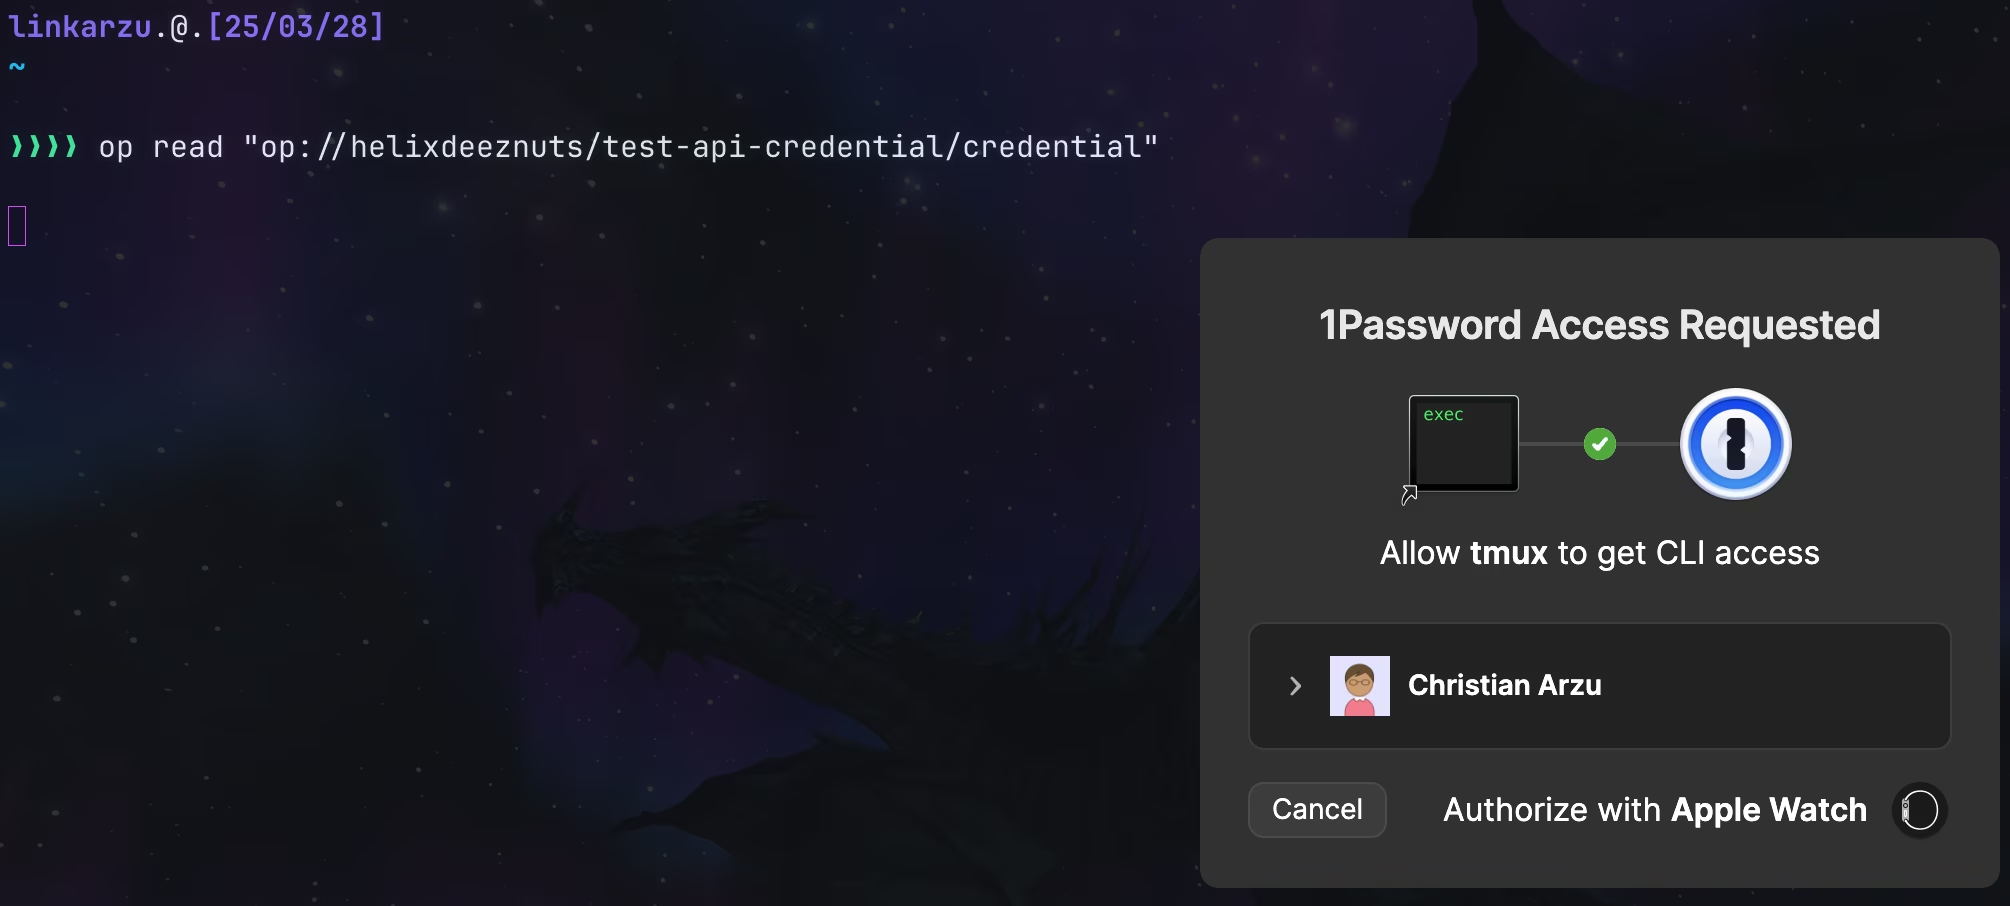 Authorize the request
- And then we can see the secret
1
2
3
4
5
linkarzu.@.[25/03/28]
~
❯❯❯❯ op read "op://helixdeeznuts/test-api-credential/credential"

YouCanProceedToLigmaNaughts
- If you want to support me in keeping this blogpost ad free, start your 1password 14 day free trial by clicking the image below
Python script
Be really careful with running scripts you find out on the internet, a script can basically do anything you can do, install malware, delete files, read your passwords, etc
- So make sure you trust the person providing the script
- And at least pass it through an LLM (chatgpt, etc) asking if its safe or not (this is just something basic as you shouldn’t trust LLMs either, but at least it’s better than nothing)
- The python script can be found in my dotfiles
- py/switch_scene.py
- If you like my dotfiles ⭐⭐⭐⭐ remember to star them ⭐⭐⭐⭐
- Make sure to modify the path to the secret:
onepassword_secret = "op://helixdeeznuts/obs-websocket-password/credential"
starting-soonis the name of the scene and it has to match what you see in OBS- If you have auth disabled in OBS, you can pass the
--no-authflag, so that it does not try to get the secret from1password
1
2
3
4
5
6
7
8
9
python3 ~/github/dotfiles-latest/scripts/macos/mac/obs/scene-switcher/py/switch_scene.py starting-soon
python3 ~/github/dotfiles-latest/scripts/macos/mac/obs/scene-switcher/py/switch_scene.py video-and-stream
python3 ~/github/dotfiles-latest/scripts/macos/mac/obs/scene-switcher/py/switch_scene.py guest1
python3 ~/github/dotfiles-latest/scripts/macos/mac/obs/scene-switcher/py/switch_scene.py guest2

python3 ~/github/dotfiles-latest/scripts/macos/mac/obs/scene-switcher/py/switch_scene.py starting-soon --no-auth
python3 ~/github/dotfiles-latest/scripts/macos/mac/obs/scene-switcher/py/switch_scene.py video-and-stream --no-auth
python3 ~/github/dotfiles-latest/scripts/macos/mac/obs/scene-switcher/py/switch_scene.py guest1 --no-auth
python3 ~/github/dotfiles-latest/scripts/macos/mac/obs/scene-switcher/py/switch_scene.py guest2 --no-auth
- When I run the script for the first time in a new machine or dir, the
.venvwill be created and dependencies installed automatically
1
2
3
4
5
6
7
8
9
10
11
12
13
14
15
16
17
18
19
20
21
22
23
24
25
26
27
linkarzu.@.[25/03/28] via 🐍 v3.9.6 (.venv)
~/obs-script/scene-switcher

❯❯❯❯ python3 ~/github/dotfiles-latest/scripts/macos/mac/obs/scene-switcher/py/switch_scene.py starting-soon

[+] Creating .venv and installing dependencies...
Requirement already satisfied: pip in /Users/linkarzu/github/dotfiles-latest/scripts/macos/mac/obs/scene-switcher/py/.venv/lib/python3.9/site-packages (21.2.4)
Collecting pip
  Using cached pip-25.0.1-py3-none-any.whl (1.8 MB)
Installing collected packages: pip
  Attempting uninstall: pip
    Found existing installation: pip 21.2.4
    Uninstalling pip-21.2.4:
      Successfully uninstalled pip-21.2.4
Successfully installed pip-25.0.1
Collecting obsws-python (from -r /Users/linkarzu/github/dotfiles-latest/scripts/macos/mac/obs/scene-switcher/py/requirements.txt (line 1))
  Using cached obsws_python-1.7.1-py3-none-any.whl.metadata (5.5 kB)
Collecting tomli>=2.0.1 (from obsws-python->-r /Users/linkarzu/github/dotfiles-latest/scripts/macos/mac/obs/scene-switcher/py/requirements.txt (line 1))
  Using cached tomli-2.2.1-py3-none-any.whl.metadata (10 kB)
Collecting websocket-client (from obsws-python->-r /Users/linkarzu/github/dotfiles-latest/scripts/macos/mac/obs/scene-switcher/py/requirements.txt (line 1))
  Using cached websocket_client-1.8.0-py3-none-any.whl.metadata (8.0 kB)
Using cached obsws_python-1.7.1-py3-none-any.whl (30 kB)
Using cached tomli-2.2.1-py3-none-any.whl (14 kB)
Using cached websocket_client-1.8.0-py3-none-any.whl (58 kB)
Installing collected packages: websocket-client, tomli, obsws-python
Successfully installed obsws-python-1.7.1 tomli-2.2.1 websocket-client-1.8.0
Switched to scene: starting-soon
- Notice what happens when you switch scenes
1
2
python3 ~/github/dotfiles-latest/scripts/macos/mac/obs/scene-switcher/py/switch_scene.py video-and-stream
python3 ~/github/dotfiles-latest/scripts/macos/mac/obs/scene-switcher/py/switch_scene.py starting-soon
1
2
3
4
5
6
7
8
9
10
11
12
13
14
15
linkarzu.@.[25/03/28] via 🐍 v3.9.6 (.venv) took 3s
~/obs-script/scene-switcher

❯❯❯❯ python3 ~/github/dotfiles-latest/scripts/macos/mac/obs/scene-switcher/py/switch_scene.py "video-and-stream"

Switched to scene: video-and-stream

------------------------------------------------------

linkarzu.@.[25/03/28] via 🐍 v3.9.6 (.venv)
~/obs-script/scene-switcher

❯❯❯❯ python3 ~/github/dotfiles-latest/scripts/macos/mac/obs/scene-switcher/py/switch_scene.py "starting-soon"

Switched to scene: starting-soon
Switch using keyboard shortcuts
- As you’re able to tell, executing the script every time is not practical
- I can switch scenes, it doesn’t matter what app I’m on, I could be on my terminal or in my browser and I could switch scenes easily
- To do this in macOS I use a combination of tools, one of them is called karabiner-elements.
- If you want to learn in detail how I use karabiner, go and check this video out:
- The bar on the top of the screen called
SketchyBarautomatically updates with the name of the scene - If you want to learn more about SketchyBar, check this video below:
- Do you like the way my terminal looks and the CLI tools I use and all that stuff?
- I go over them in detail in this other video:
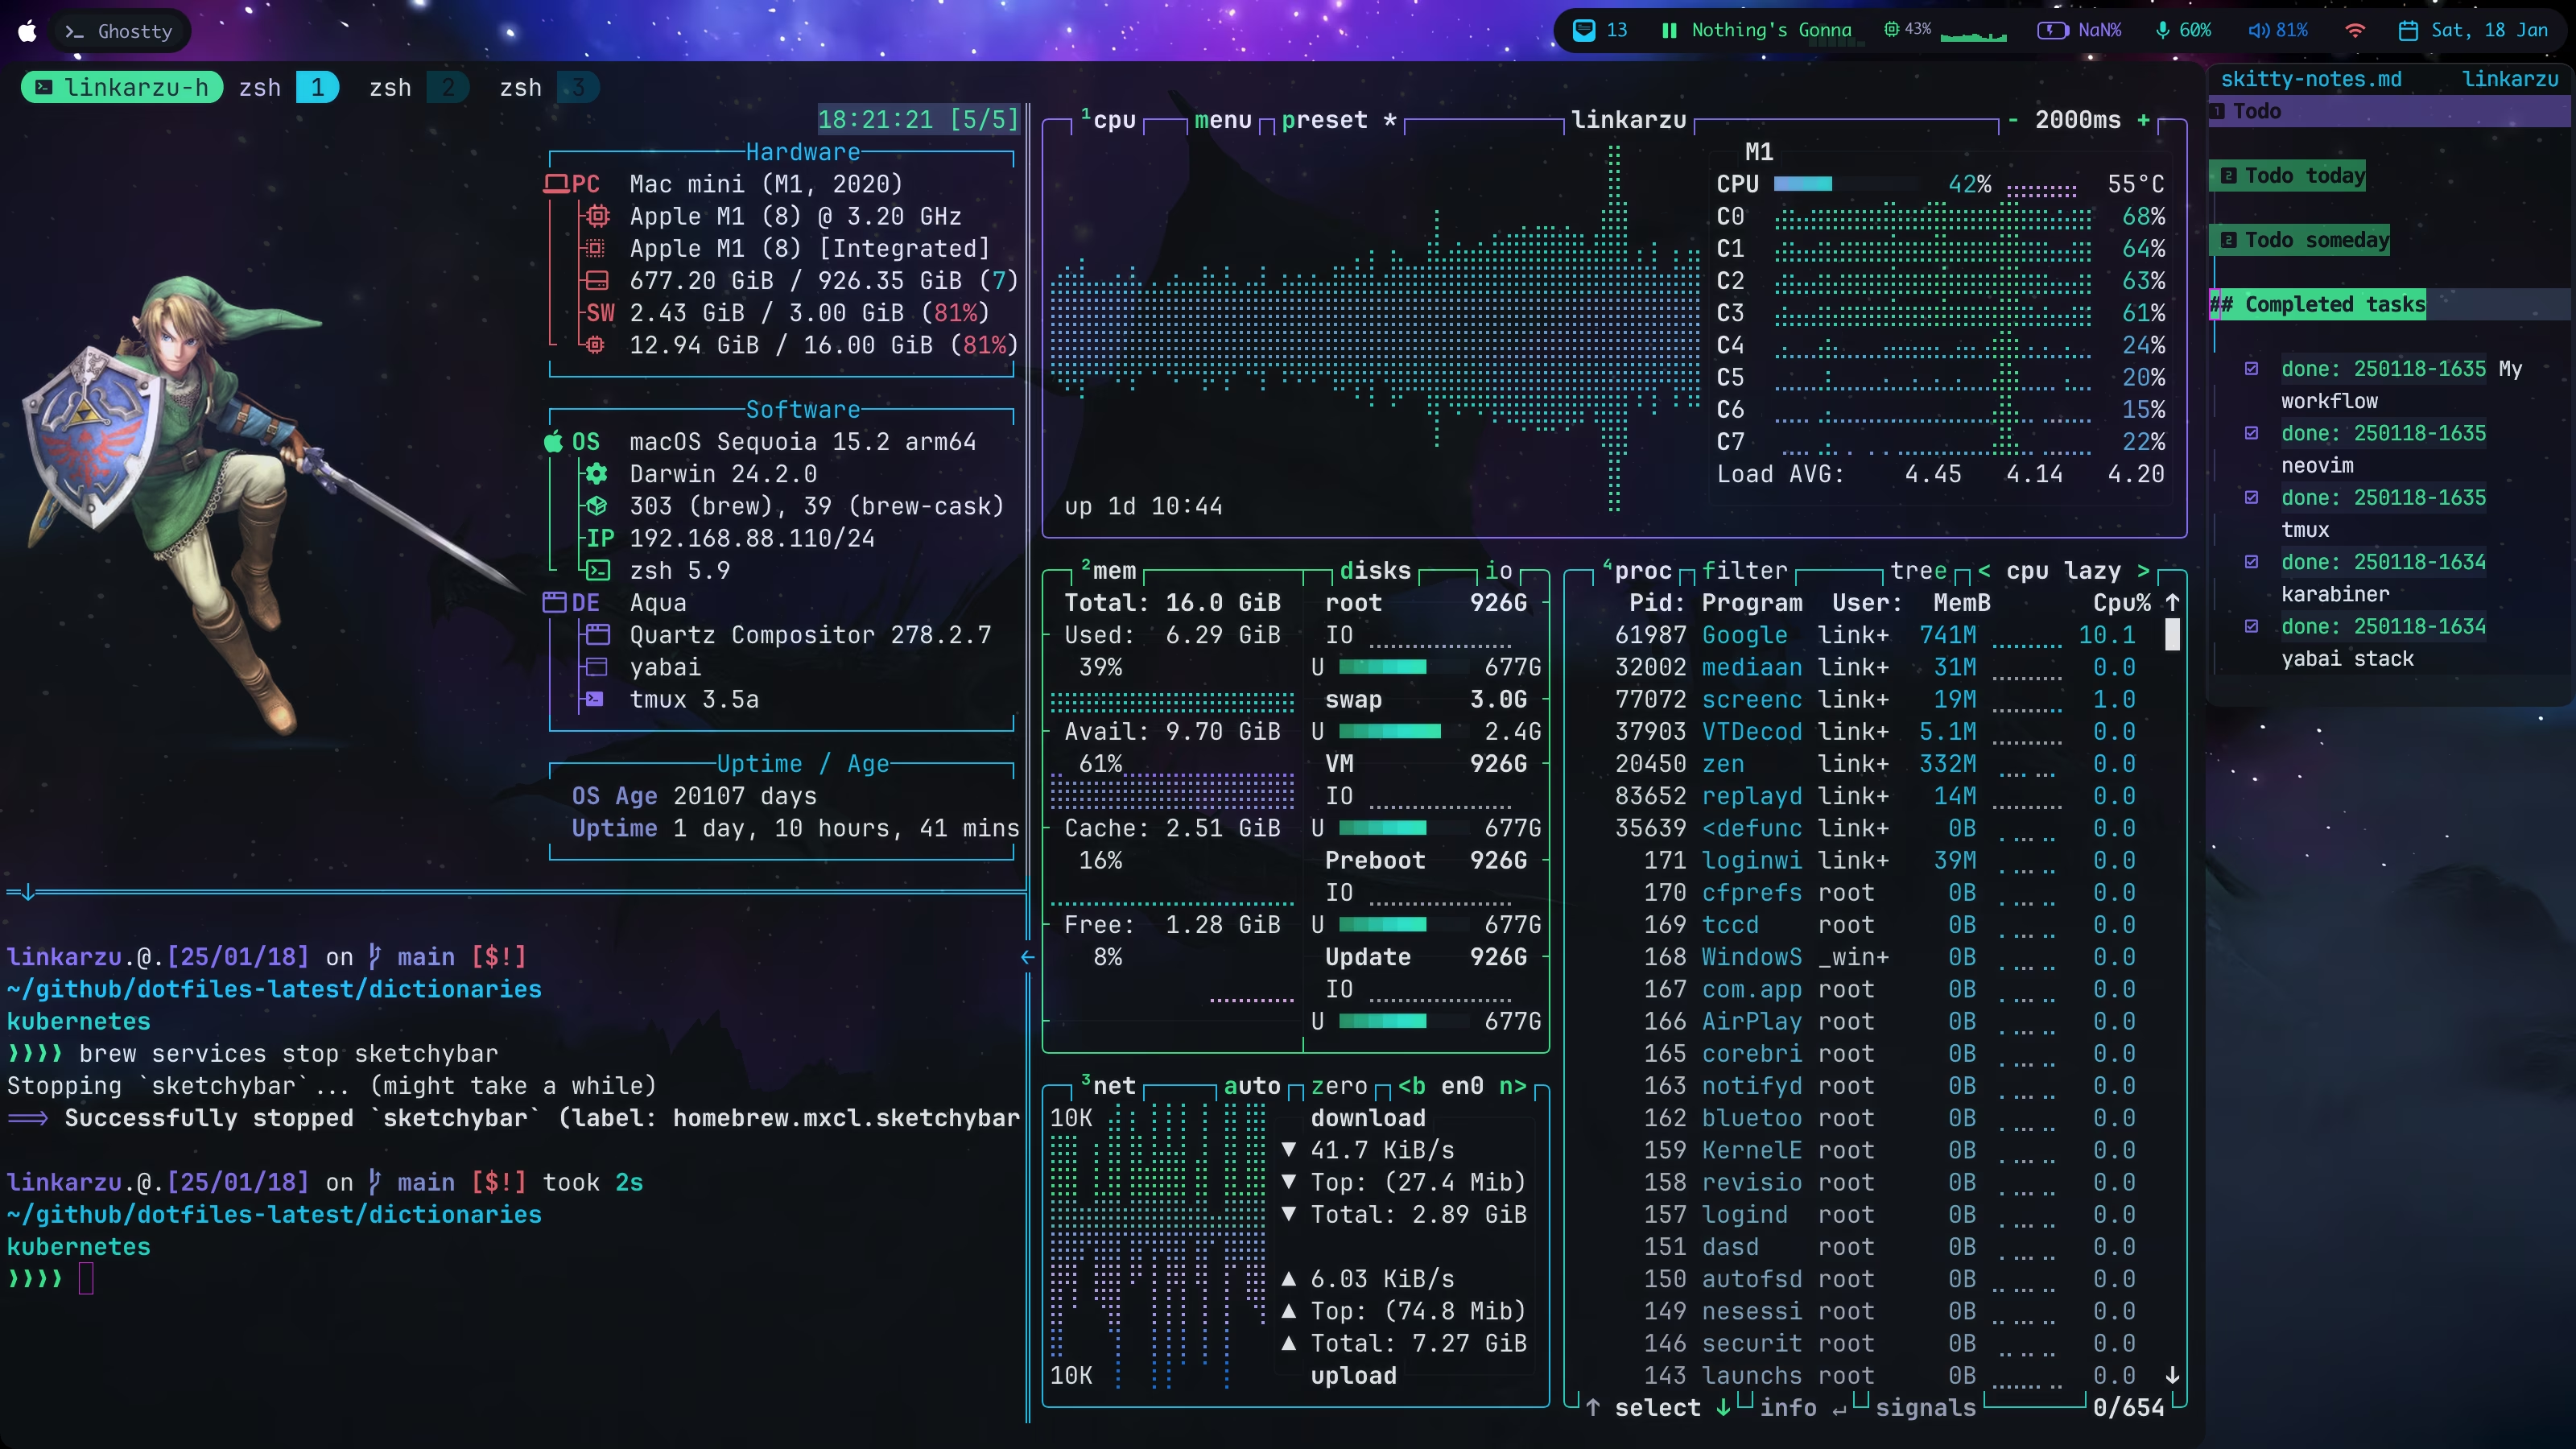 How my macOS terminal usually looks
Other videos mentioned
Community-driven promotion
Do you want to promote yourself in my channel? I’m not talking about a company like notion, brilliant, and all those other ones we’re using to seeing. I’m talking about you as a person, do you have a project, course, youtube channel or product and trying to reach an audience?
If interested, pricing and all the details can be found in this other page
You’re a fraud, why do you ask for money, isn’t YouTube Ads enough?
- I explain all of this in the “about me page” link below:
- youre-a-fraud-why-do-you-ask-for-money-isnt-youtube-ads-enough
- Above you’ll also find links to my discord, social media, etc