The Power User's 2025 Guide to macOS ricing | Yabai, Simple-bar, SketchyBar, Fastfetch, Btop & More
Learn how to transform your macOS into a highly customized and productive environment, and the best of all, make it look cool like Linux
The Power User's 2025 Guide to macOS ricing | Yabai, Simple-bar, SketchyBar, Fastfetch, Btop & More
Contents
Table of contents
- YouTube video
- Outcome of this video
- Pre-requisites
- Song to accompany the video (only for connoisseurs)
- Tmux
- Btop
- Fastfetch
- simple-bar and SketchyBar
- skitty-notes
- Starship
- Yabai
- karabiner-elements
- Tmux sessions
- Neovim
- Share your tips
- Other videos mentioned
- Community-driven promotion
- You’re a fraud, why do you ask for money, isn’t YouTube Ads enough?
YouTube video
Outcome of this video
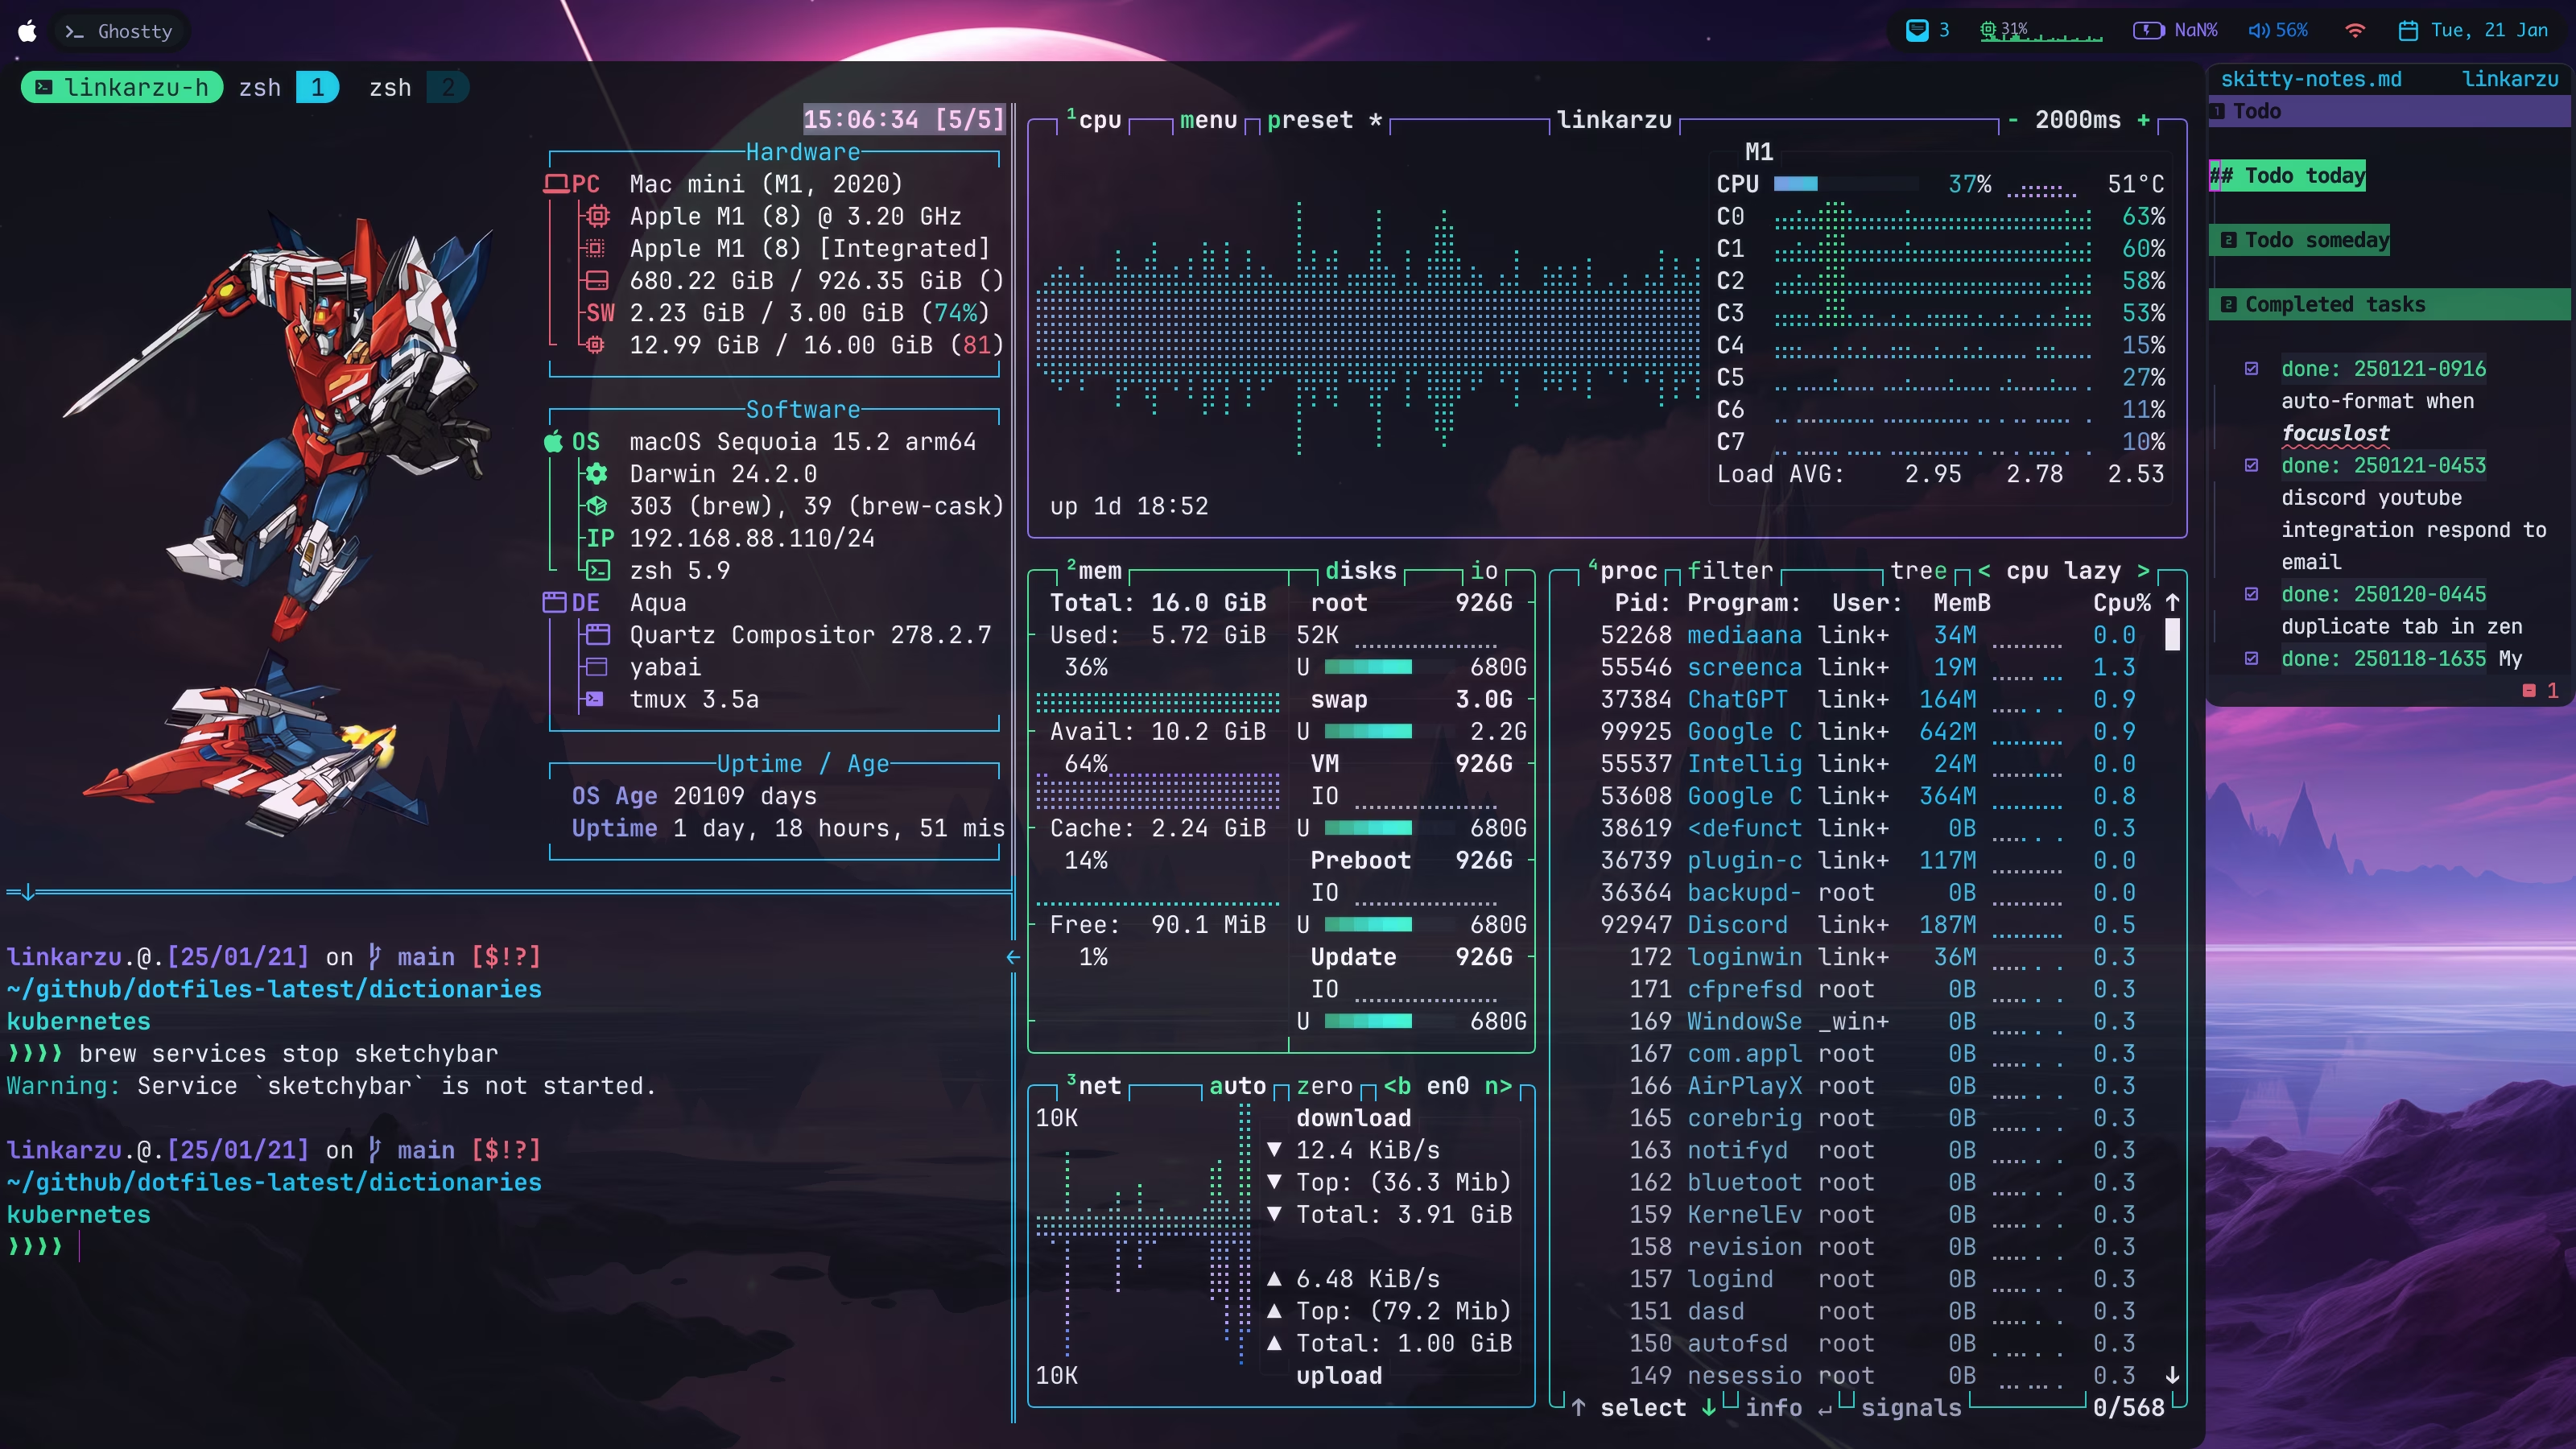
- After following the recommendations and steps in this video, this is what your terminal and overall setup can look like:
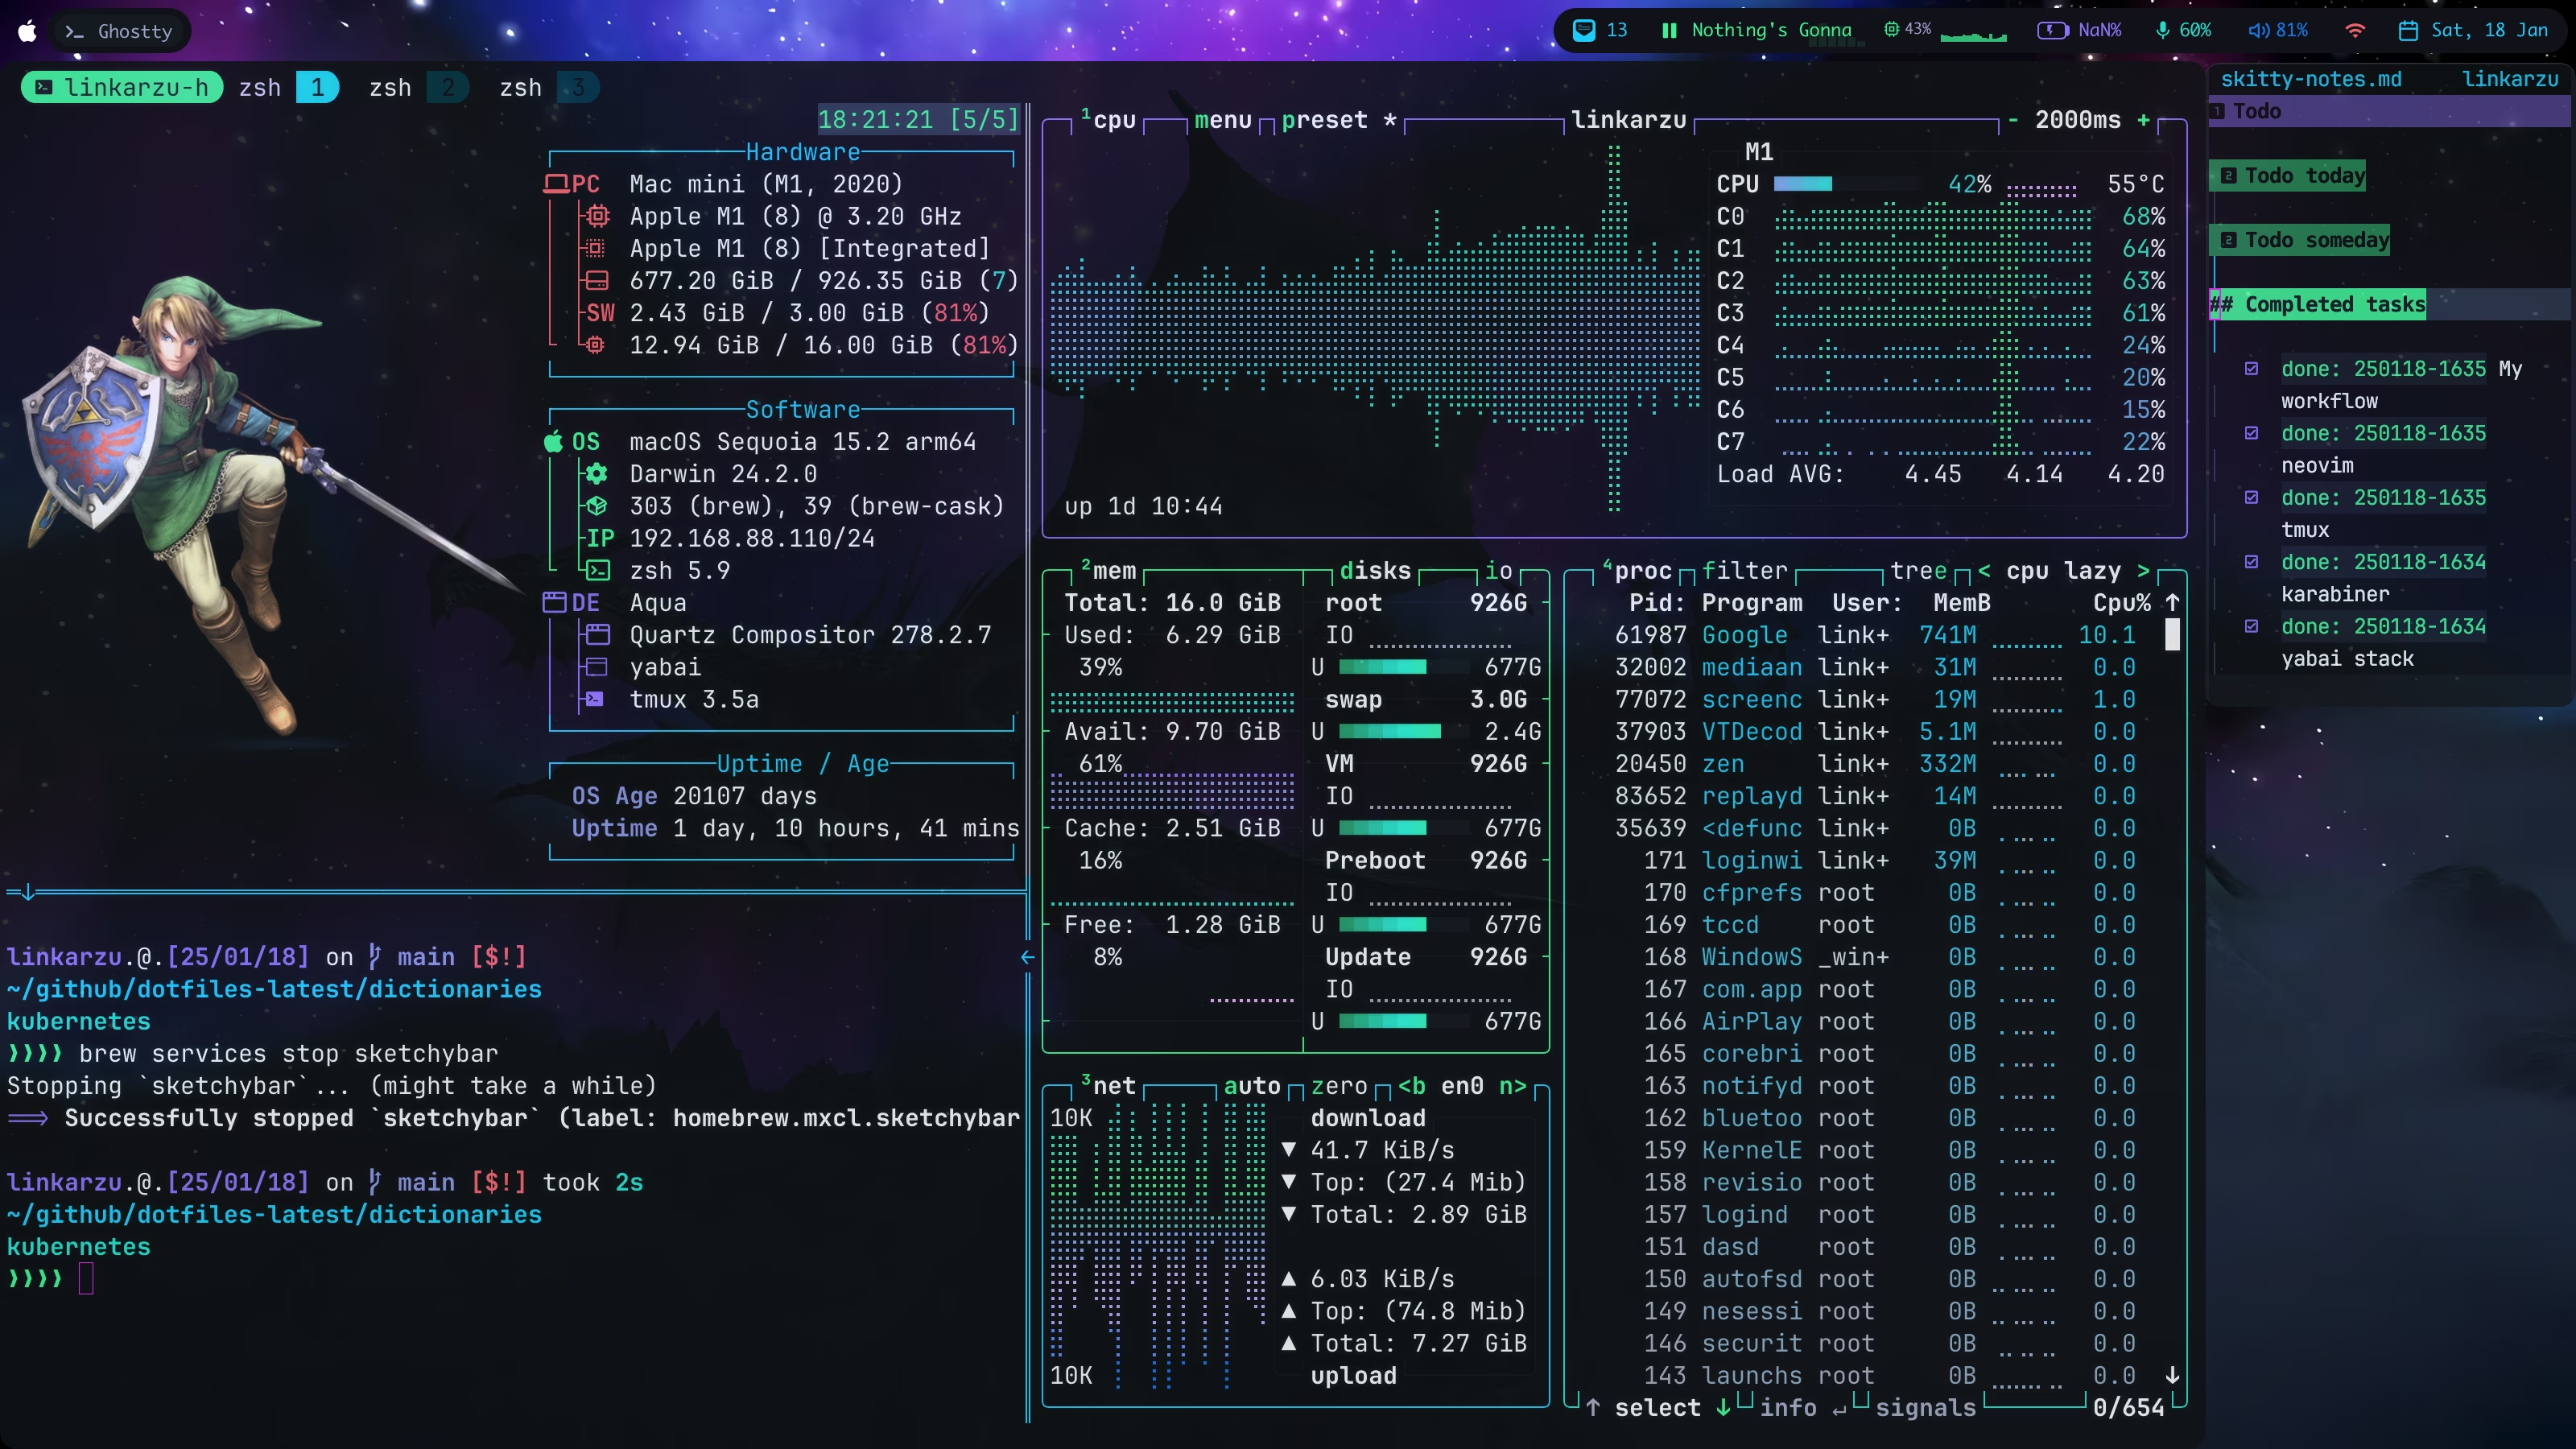 macos desktop with fastfetch, btop and ghostty
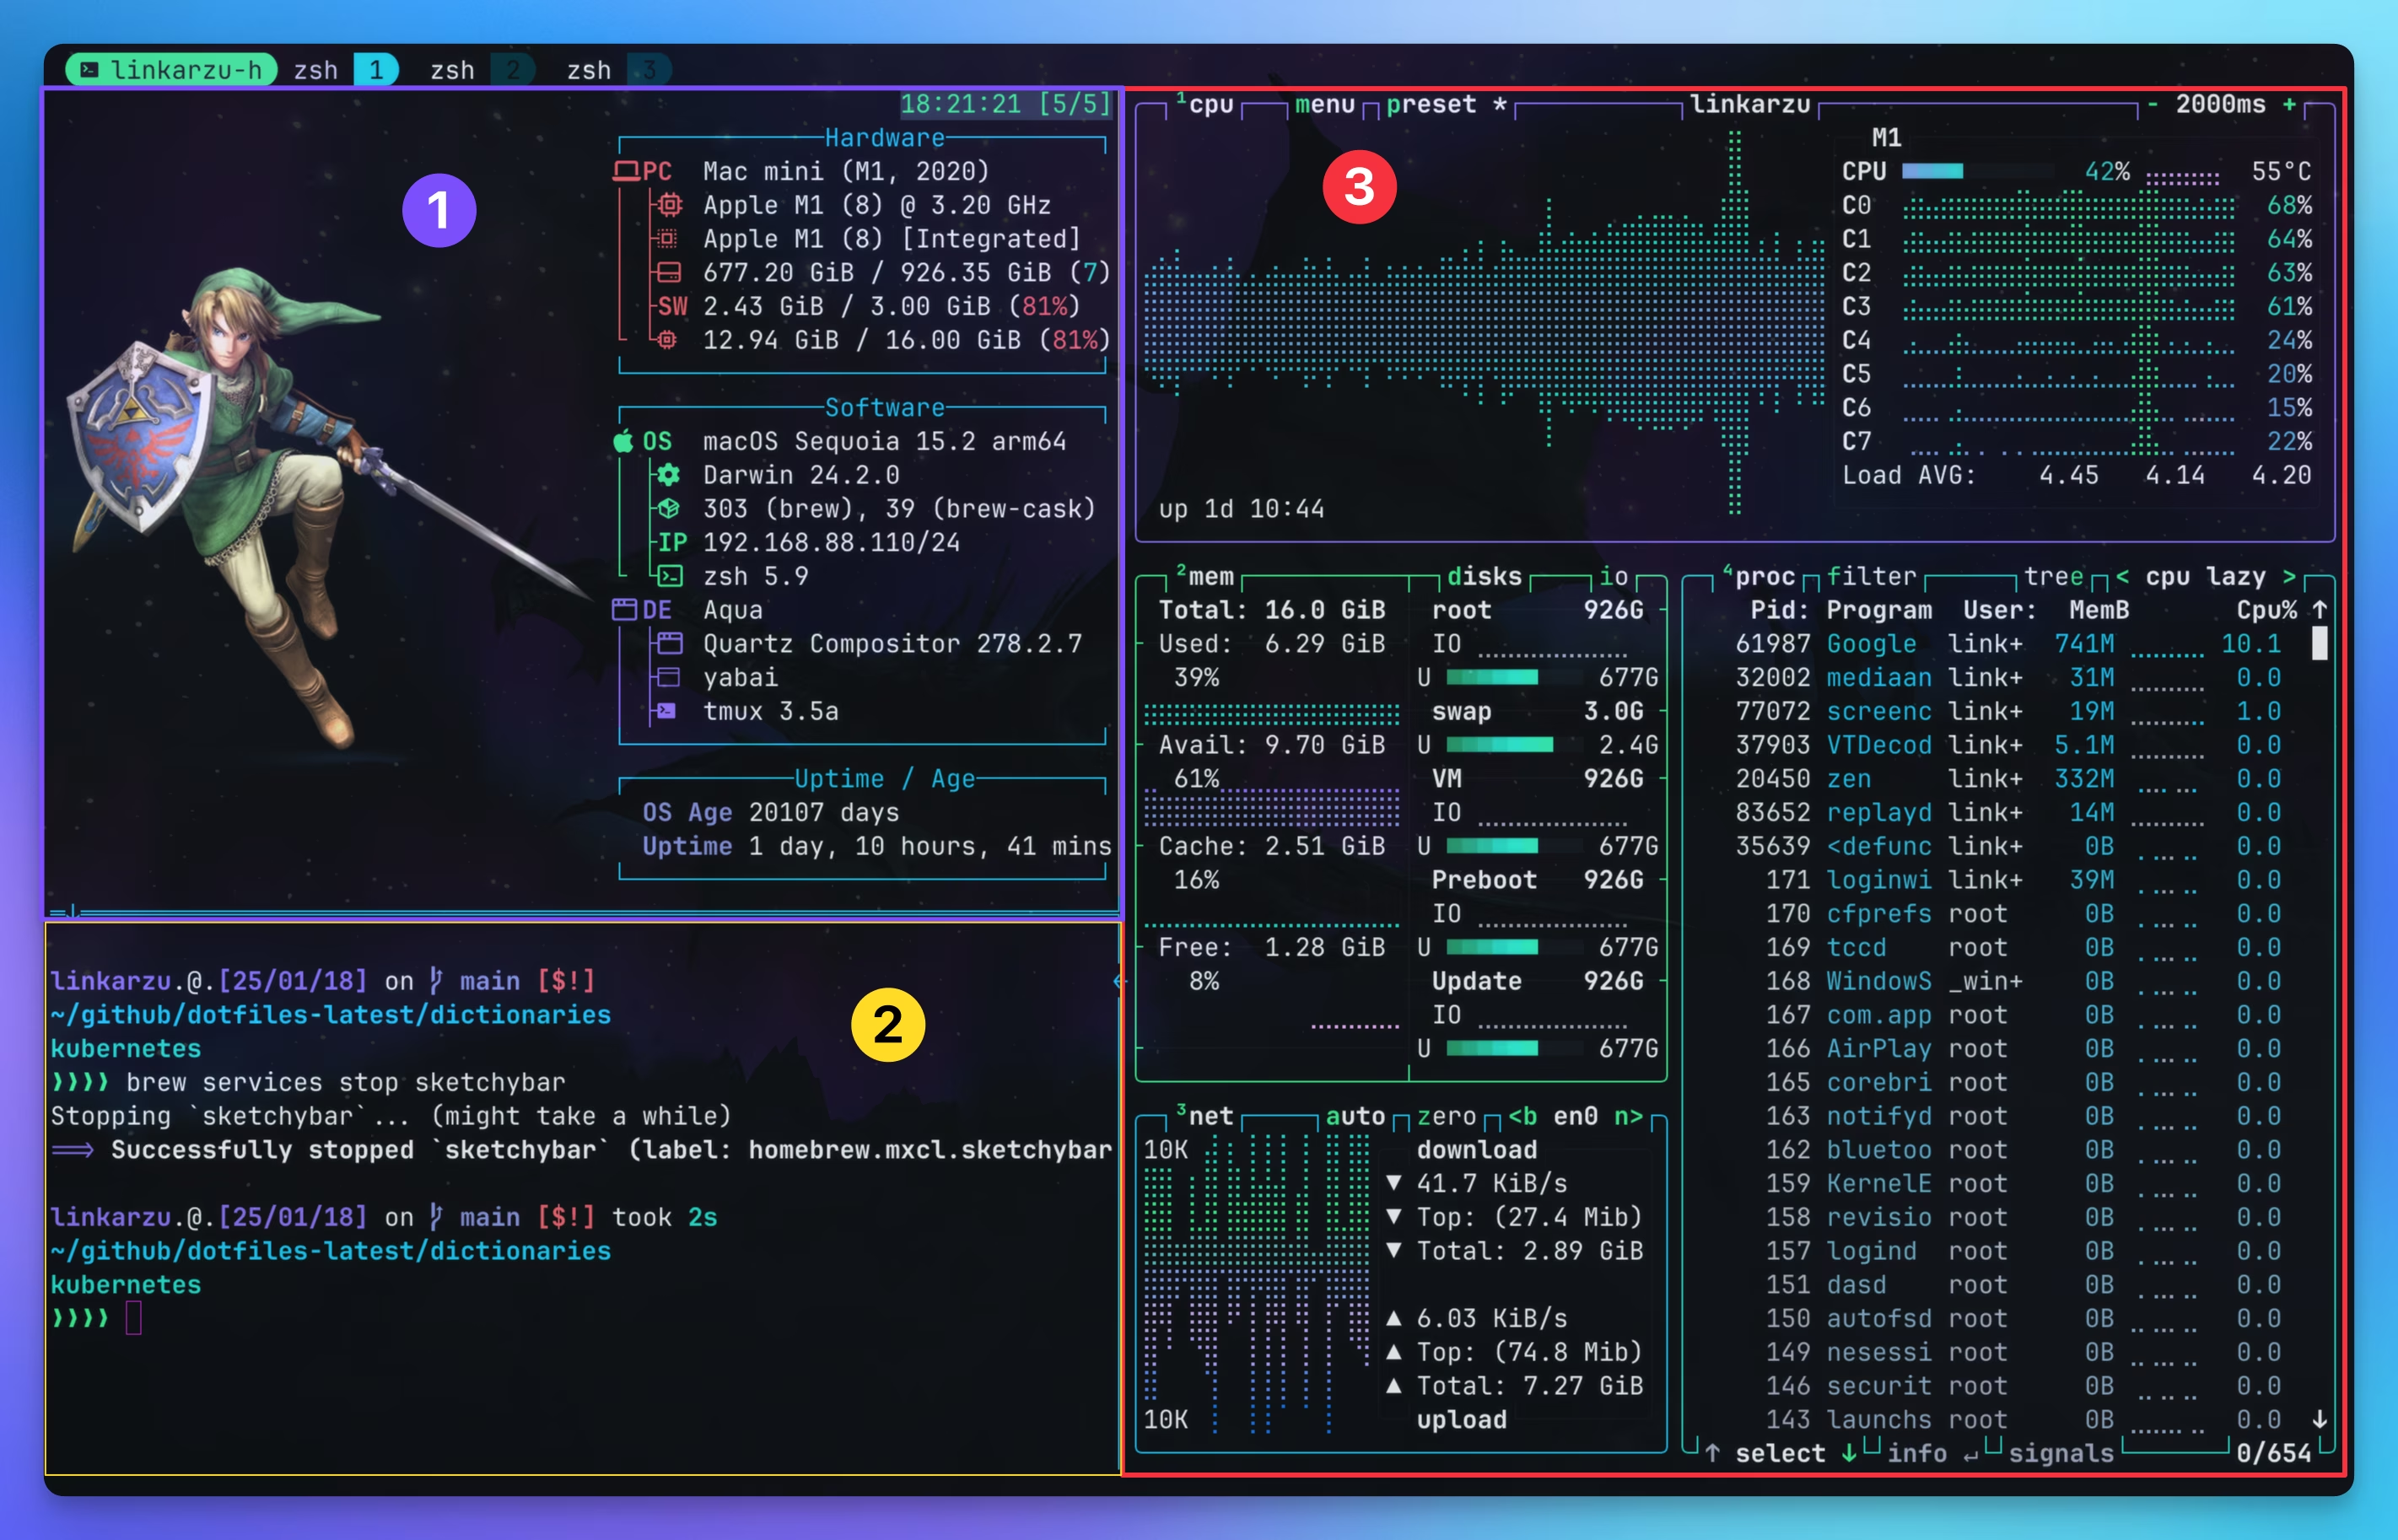
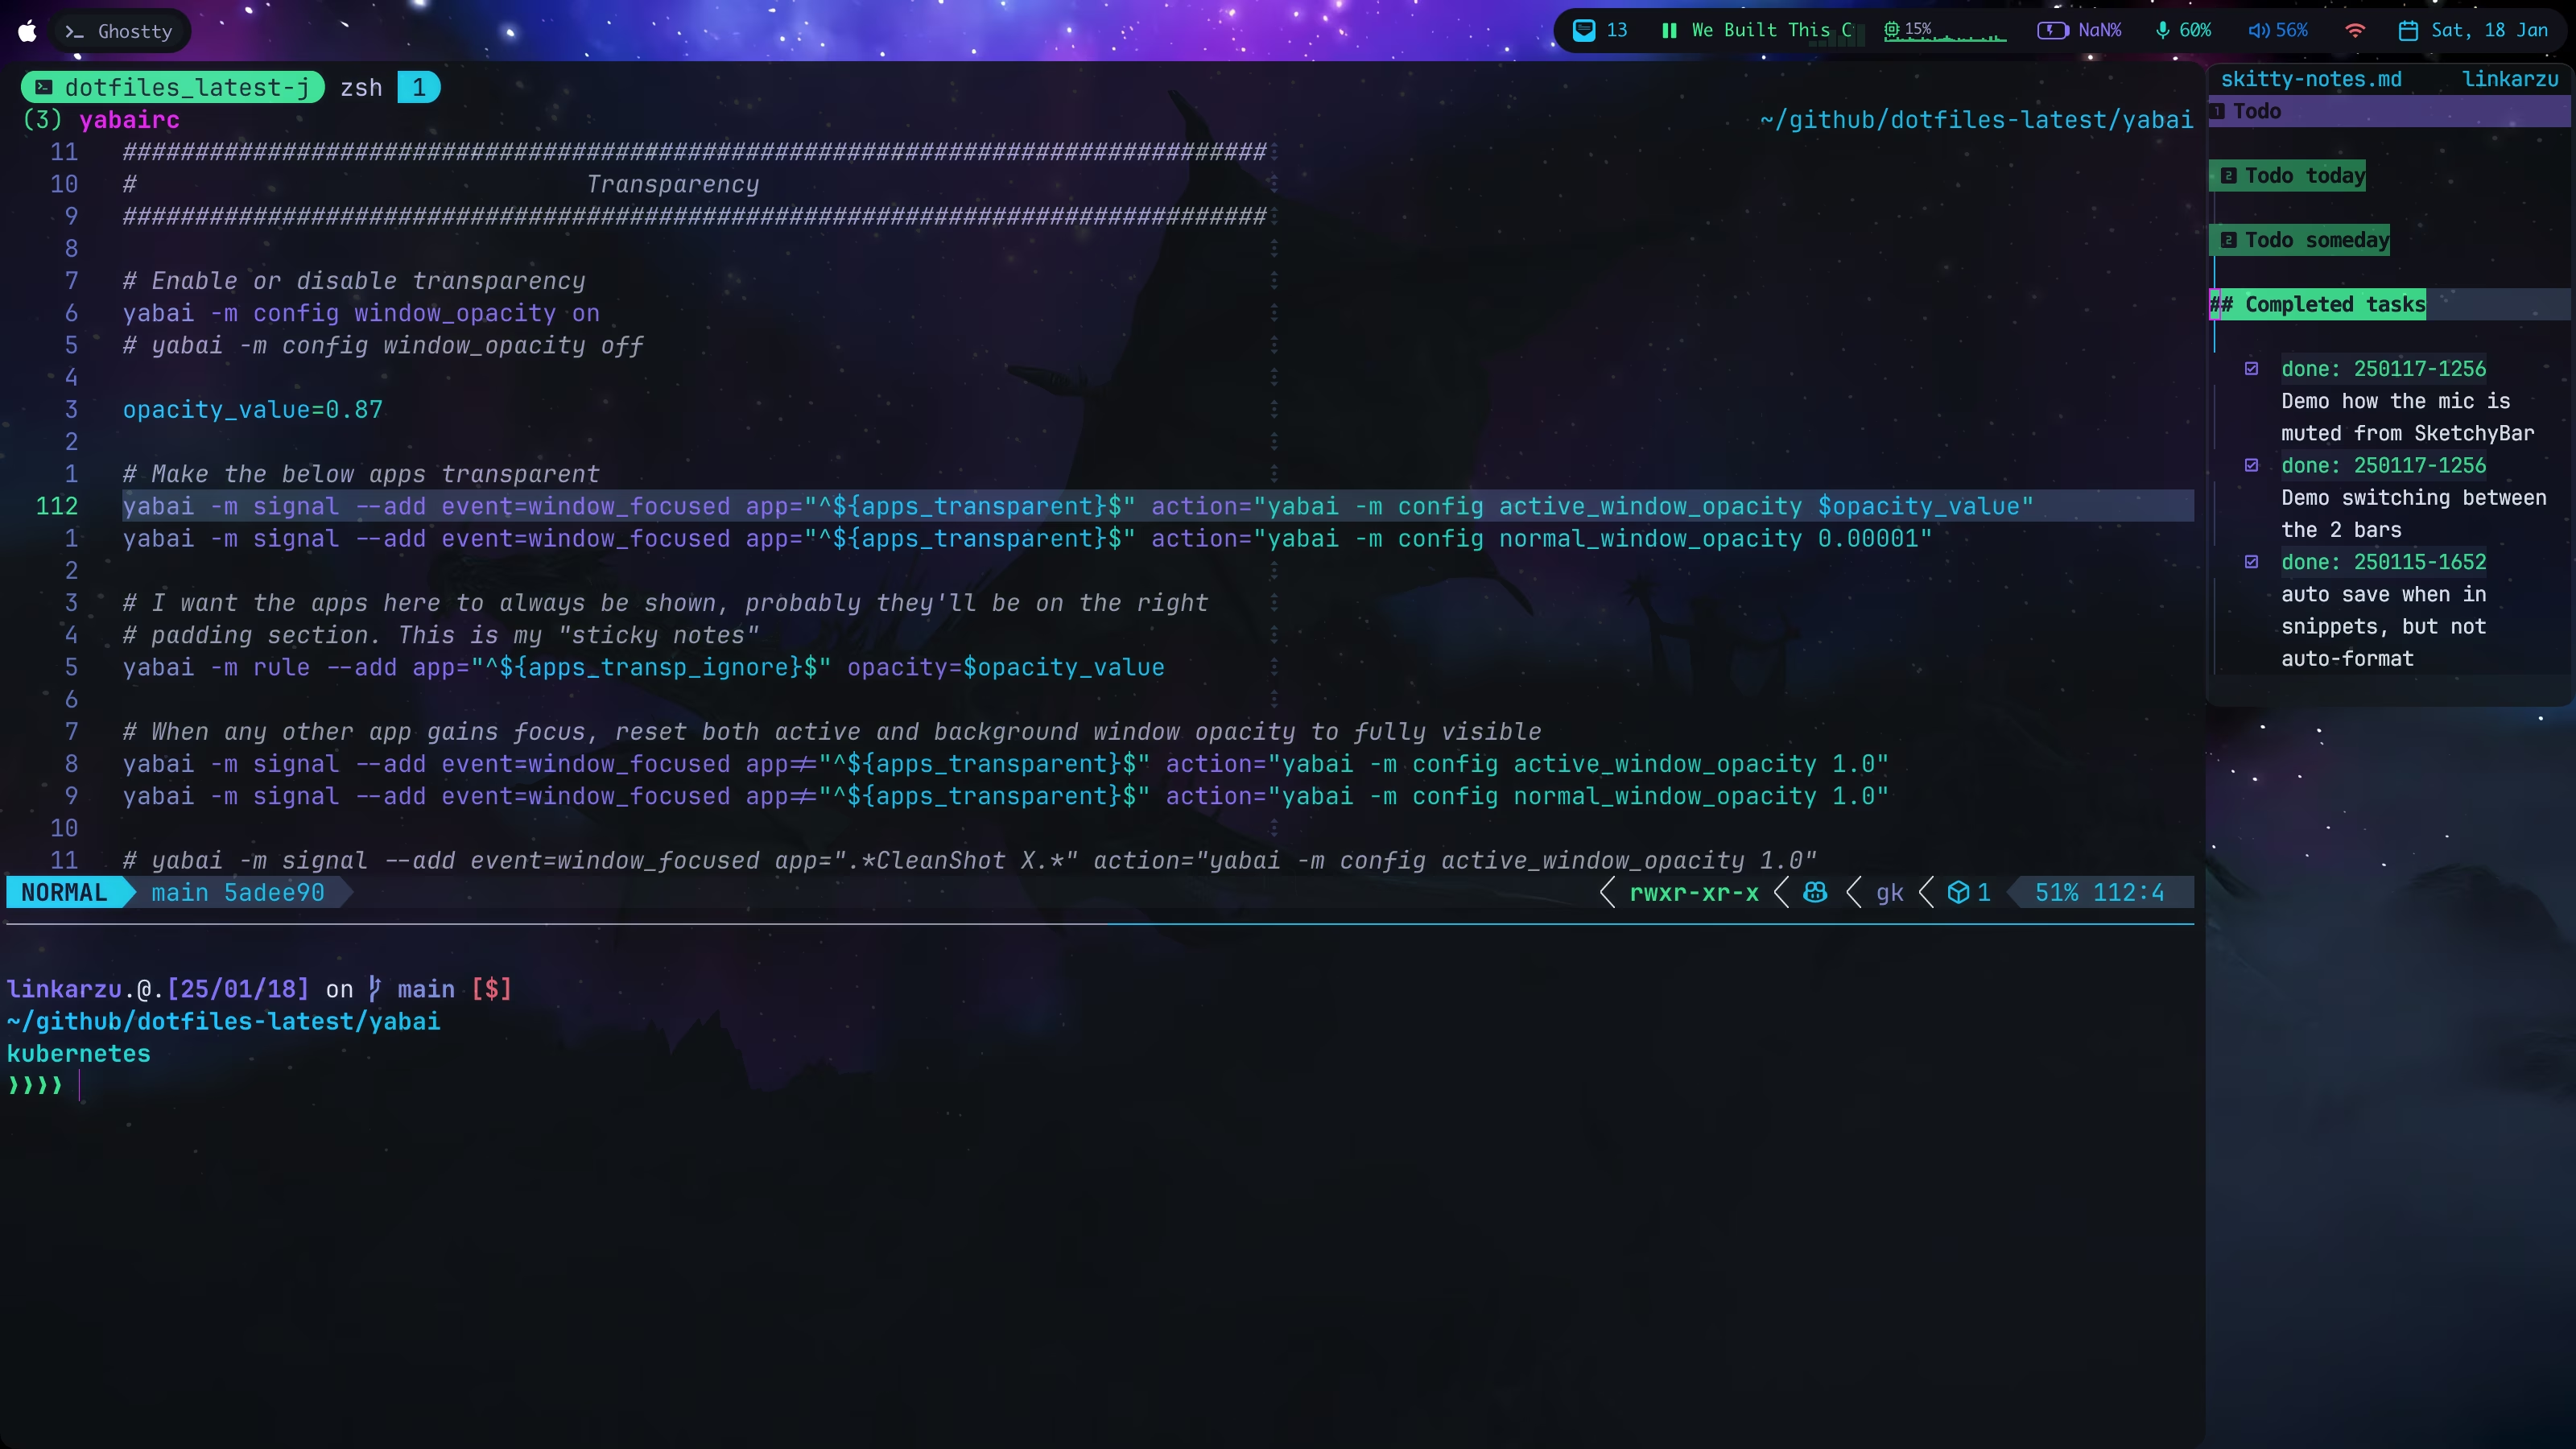 macos desktop with ghostty and a tmux split
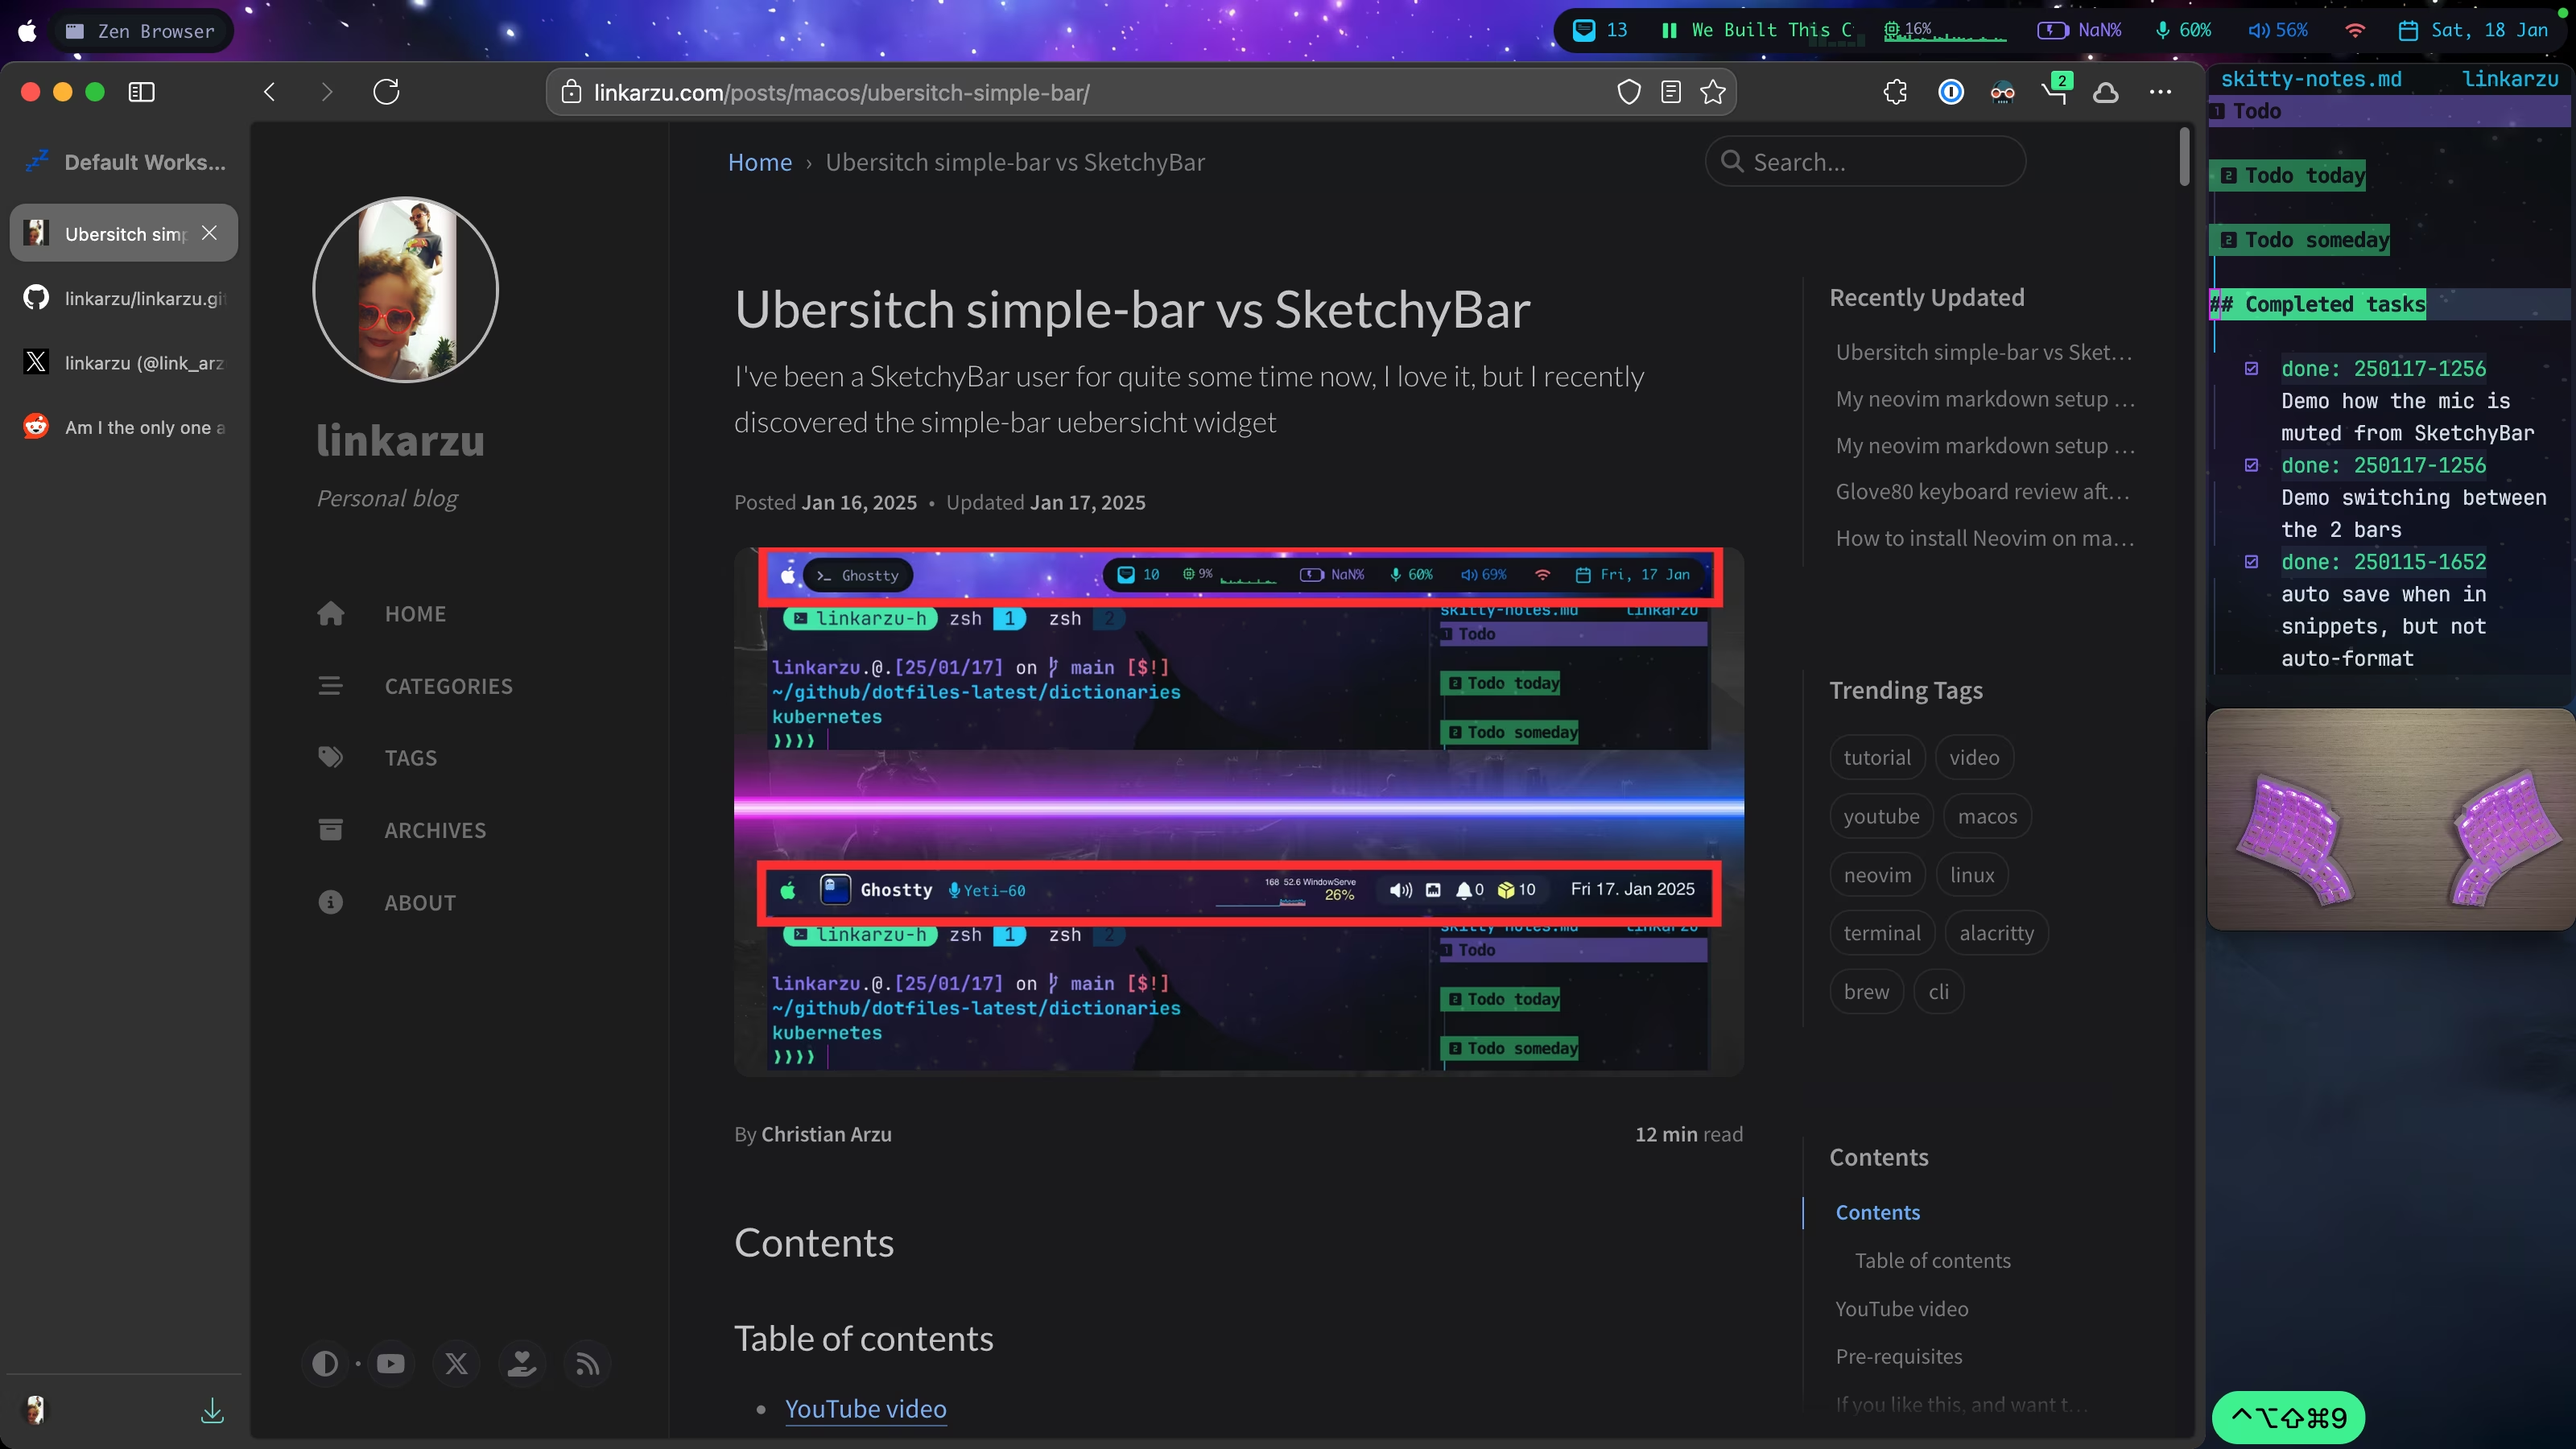 macOS desktop with zen browser
- This is a starting point, if you have other tips, share them down in the comments section of the YouTube video or this blogpost
- I shared my setup in the
r/unixpornsubreddit, in case you want to go and check out other cool setups, the link is here
Pre-requisites
Homebrew
- I install all my apps through Homebrew, I don’t like installing stuff through
.dmgfiles, why? - Because if I switch to another computer, I already have my brewfiles with the stuff I install all the time and I can install all the apps I need really quickly, usually through a script (I’ll demo this some day)
- If you’re new to
homebrewand don’t know how to install apps with it, check out my tutorial:
Terminal
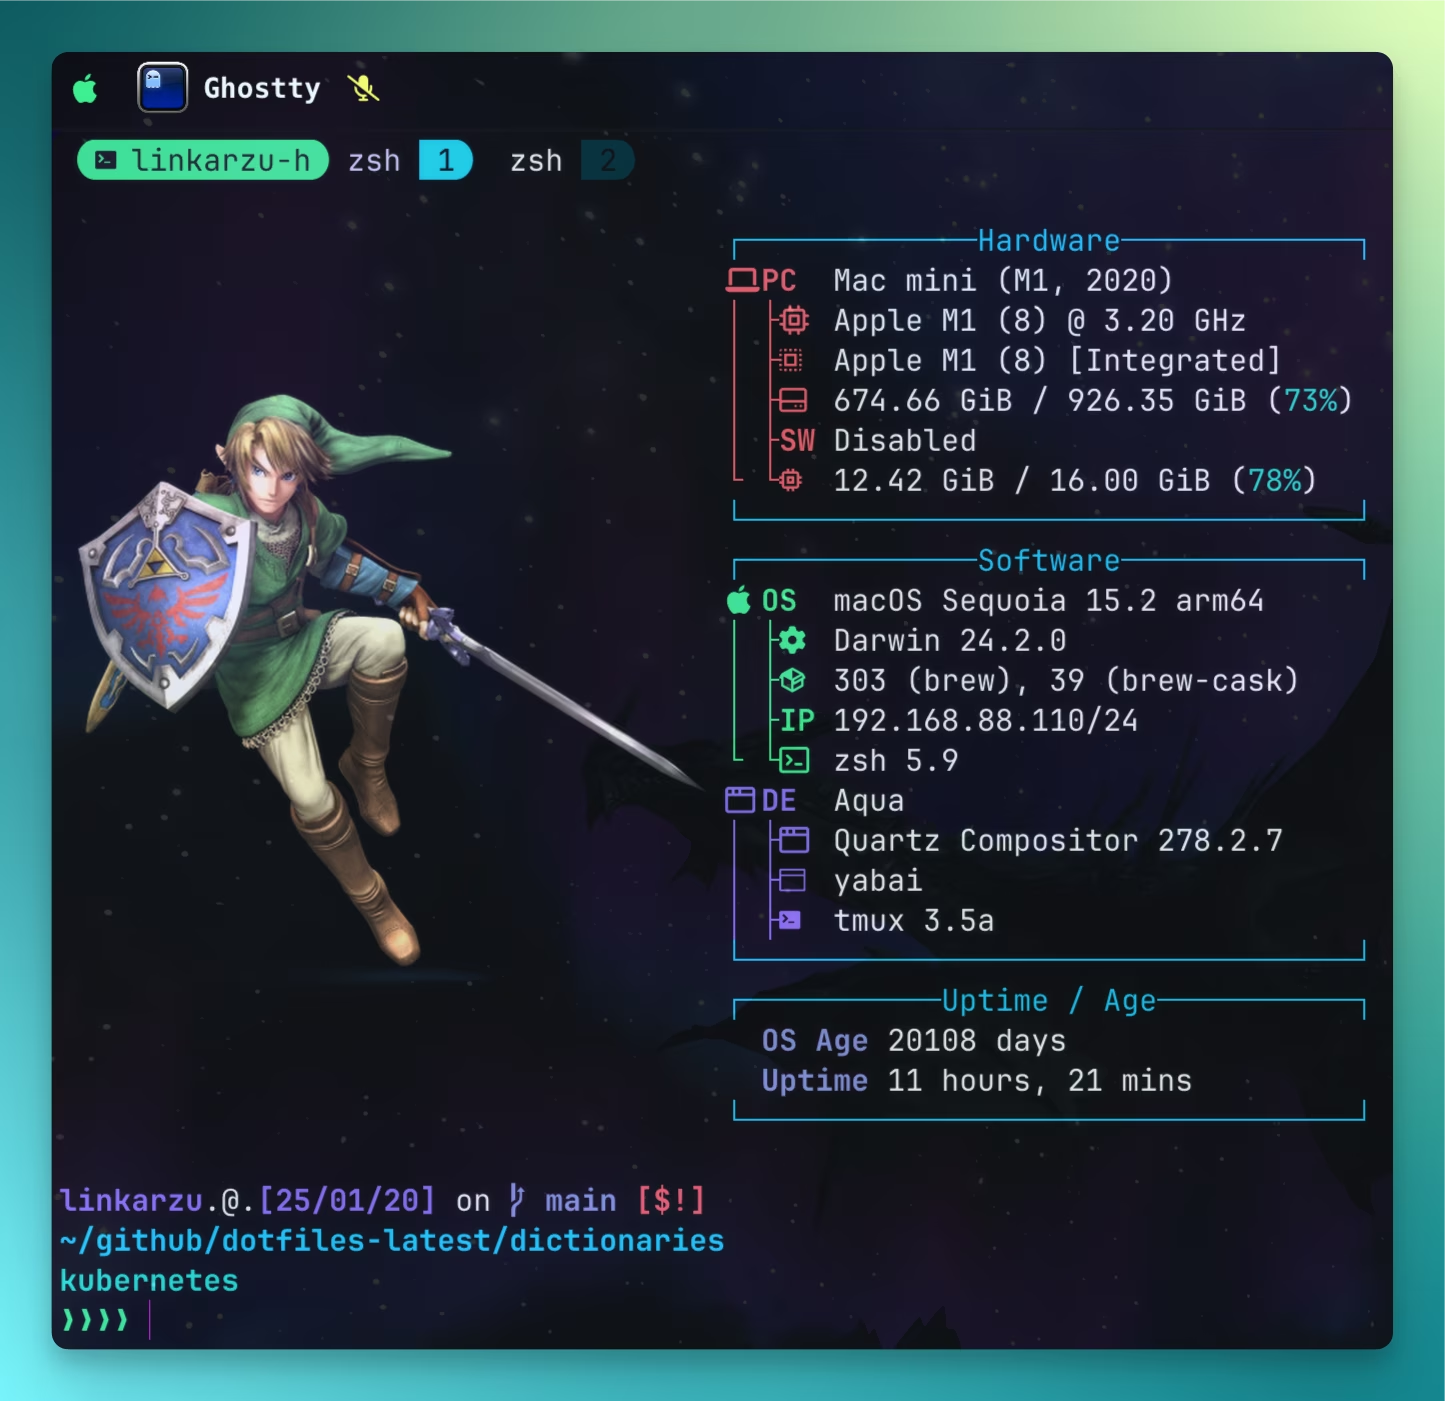
- I use Ghostty as of Jan 2025, I would recommend you to use a terminal with image support, if you’re planning on using fastfetch, which is what shows you an image on your computer next to your stats, as seen below:
- If you want to setup Ghostty the way I do, and learn why I chose it as my default terminal, check this video out:
Song to accompany the video (only for connoisseurs)
- I do not own the video below, but if you’re my age (37 as of Jan 2025), you’ll appreciate this song and will feel the power while you read this article
- Oh man, it brought back so many memories 😭
Tmux
Tmux splits
- As seen on this image below, notice that we have the terminal (Ghostty), and it has 3 different splits or sections, notice the 3 numbers each with a different color
- These splits are created with CLI tool called tmux
- In the video I demo how I create splits, which you normally do with
ctrl+b c - I also demo how I navigate between the different splits, I do so with
ctrl+h,ctrl+j,ctrl+k,ctrl+l - If you don’t know what tmux is or how to set it up and would like to learn all the different things I do with it, check this video out:
Is Tmux only for splits?
- No, in this demo I use splits to show different apps in different sections of the terminal, but I don’t normally do this, the only scenario in which I use splits in real life, is when I’m working inside Neovim, and for some reason I need to quickly bring up my terminal
- I created a keymap that allows me to toggle the terminal
alt+t, and if I switch to a file that is in a different directory in Neovim, the split will follow me and switch to that directory - If you want to learn how to set this terminal toggle, check this video out:
Btop
- aristocratos/btop
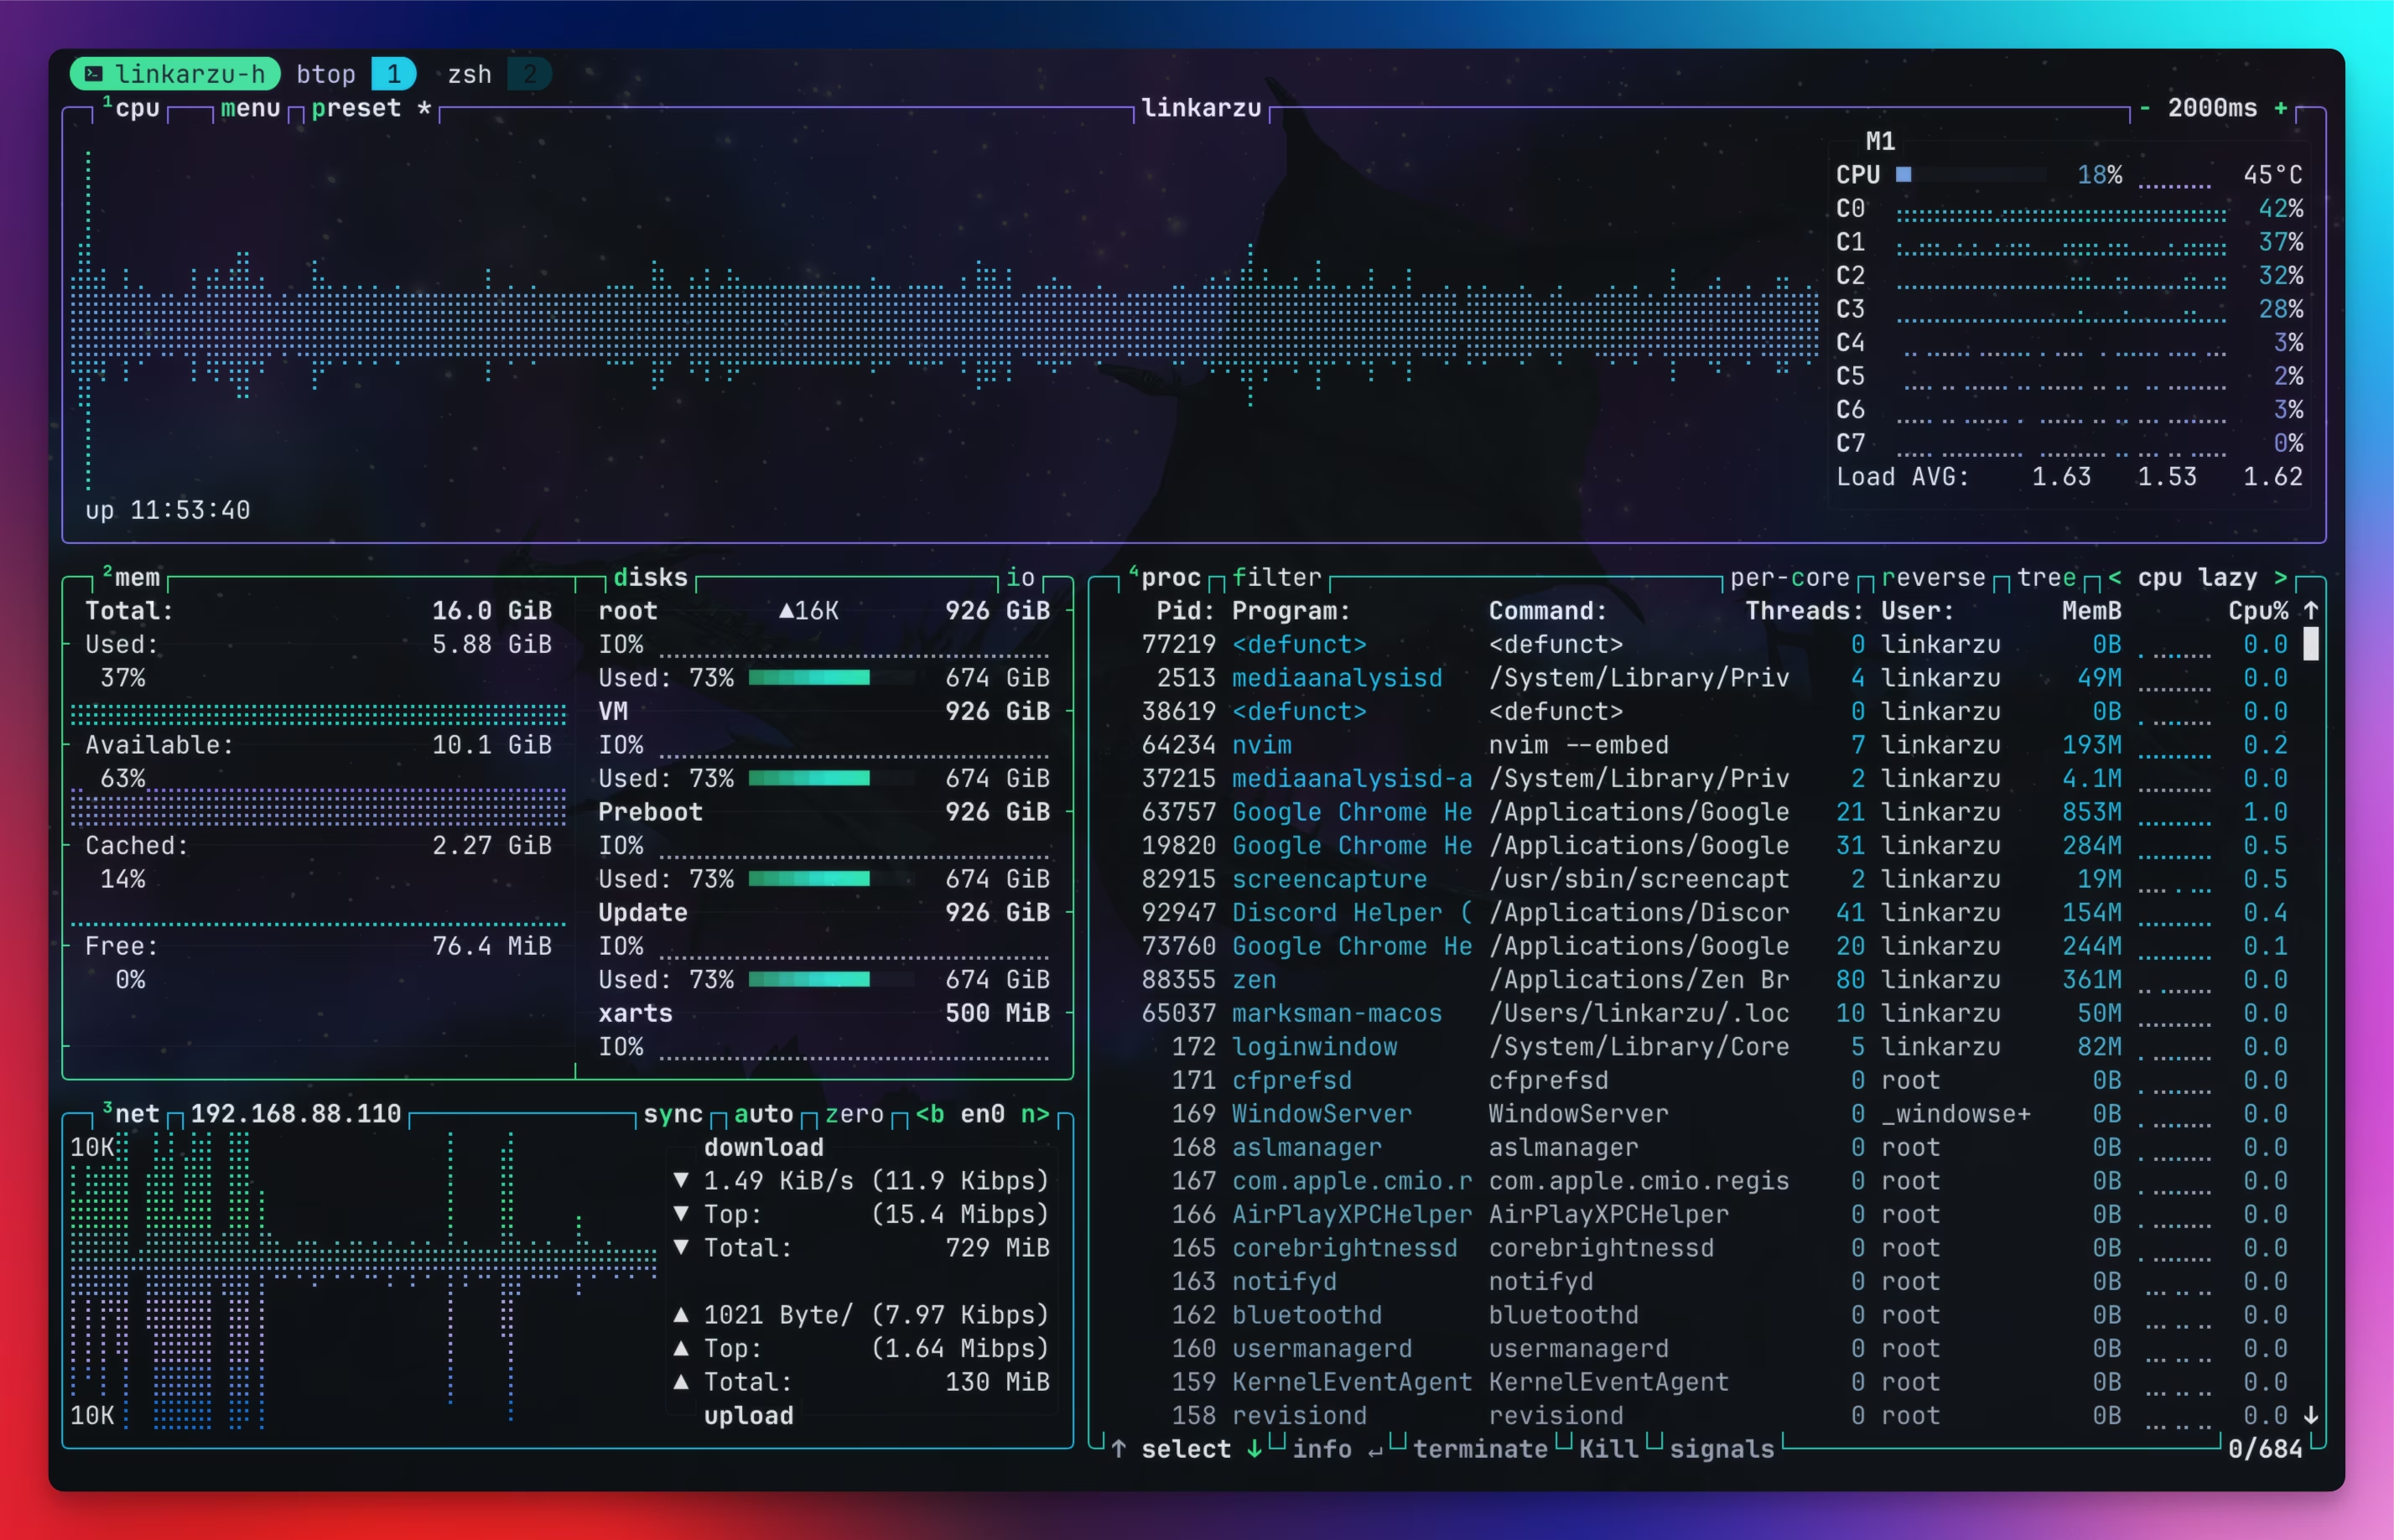
- As the github page above says: “Resource monitor that shows usage and stats for processor, memory, disks, network and processes.”
- You can see that on the image below:
- My btop configuration file can be found in my dotfiles: btop/btop.conf
- You can also find the custom theme I use themes/btop-theme.theme
- I don’t have a dedicated Btop video, but if you’d like me to create one, let me know down in the comments
Fastfetch
- Fastfetch is what you see in the image below
- I used dylanaraps/neofetch in the past, it still works, but that repo has been archived, and all the cool kids are now moving to fastfetch, so I don’t want to miss out
- My fastfetch configuration file can be found here: fastfetch/config.jsonc
- If you’re using tmux, you will have to set the logo type to
"type": "kitty-icat"instead of the default"type": "kitty-direct", or the image won’t be shown - This fastfetch setup is not something I came up with, the credit goes to this other repo which is where I grab the config from and slightly modified it: waytoabv/Dotfiles
- I don’t have a dedicated fastfetch video, but if you’d like me to create one, let me know down in the comments
simple-bar and SketchyBar
- This bar replaces the default ugly and boring macOS menubar, it’s not just something aesthetic, but it’s something really useful.
- For example, one of the things I like about it is that allows me to see how many outdated brew packages I have, so I know when its time to update, also the microphone I’m using and it’s input level
- In the video I demo both of the bars, you can see an image of them here
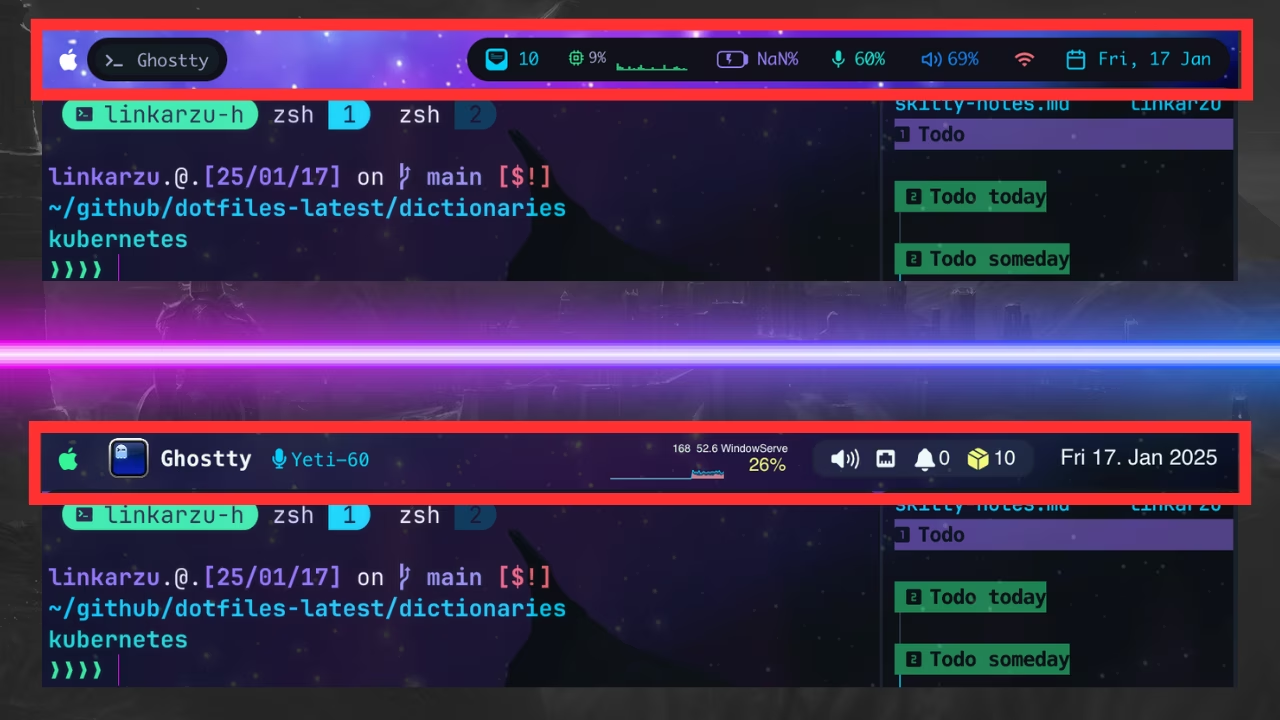 simple-bar above and SketchyBar below
- If you want to learn how I setup simple-bar in detail, check this video out:
skitty-notes
- skitty-notes is something custom I came up with that allows me to keep track of the stuff I need to do during the day, or other days, video ideas, etc
- It’s basically a sticky notes app, but the main reason I came up with it, is that it allows me to use vim motions to edit text
- It’s basically my neovim configuration (modified a bit) running inside kitty
- I have a full tutorial on how to set it up, you can find it here:
Starship
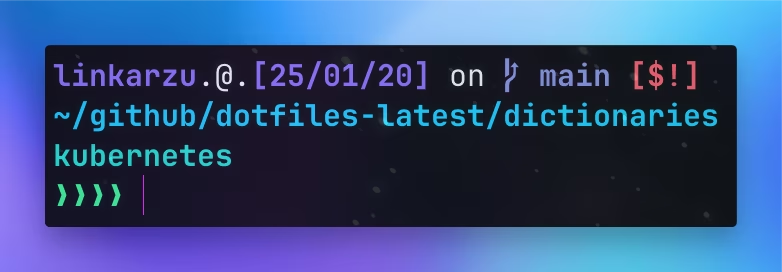
- Starship is basically my terminal prompt
- It shows me useful information, for example the path I’m on, if I have any git pending changes, and the kubernetes cluster I’m on
- This is really useful for me, because at work I work with multiple clusters, so it allows me to see which cluster and namespace I’m on
- You can find my starship config here: starship-config/active-config.toml
- My starship, btop, Ghostty, tmux, SketchyBar and Neovim themes are all applied dynamically, which means that from a single place I can switch the colorscheme in all of those different applications, so I don’t have to be manually modifying the colors in multiple places every time I want to switch them, I do this with some custom bash scripts I created, if you want to learn how to do it, here’s a video in which I go over everything in detail:
Yabai
- If you pay close attention to all the images above, specially my terminal emulator Ghostty, you will notice that it’s transparent and we can see the desktop background
- The way that I make my terminal transparent, and also the way that I manage my windows in macOS is using the yabai window manager
- Yabai can be configured in different modes, one of them is
BSPand the other one isstack
BSP mode
BSPallows you to have multiple apps on the screen at a time, so if you open 2 application in the same desktop, each app will use half of the screen, this means a few things:- If you use this mode, you have to be deciding where the apps will leave, on which desktop, for example, you want your terminal and browser to open in desktop one, spotify on desktop 2, slack and email on desktop 3, etc
- If you analyze this, this adds a lot of extra overhead you don’t really need, thinking where you want your applications to start and I didn’t want to deal with that at all, so that’s why I decided to go with the other mode,
stack
Stack mode
stackallows you to keep a single application on the screen at a time- This personally gives me the added benefit of less distraction, right now that I’m working on this article, I’m 100% focused on writing this, I don’t have slack, or youtube or any other app on the side catching my attention, so this allows me to focus way more
- Additionally, I don’t want to specify in which desktop each app starts, I don’t care and I don’t want to add that extra burden to my app management, all apps live in the same desktop, and if for example I need to switch to switch to the following apps I use the keymaps:
hyper+a+j-> Ghostty (my terminal emulator)hyper+a+k-> Zen browserhyper+a+y-> YouTubehyper+a+f-> Finder or ForkLift
- To learn how I use yabai in
stackmode, how I set my terminal transparent, and overall how I do window management in macOS, check this video out:
karabiner-elements
- As you were able to tell above, I use keymaps to switch to my different most used apps, but that’s not all
- I also have keymaps to switch to my different tmux sessions (notes, dotfiles, blogpost, docker containers, etc)
- I also have keymaps for some of my Raycast shortcuts, like to look for emojis, search for my raindrop bookmarks, perform a google search, search for youtube videos
- I also have keymaps to play around with some system settings, or execute scripts (restart yabai for example)
- I have other special keymaps, for example, if I tap
left cmdit sendscmd+c, if I tapleft optionit sendscmd+vand many others like this - To learn how I do all my different mappings to everything I mentioned above (and more), check out my karabiner-elements video:
Tmux sessions
- One of the questions I get asked a lot is, why do you use tmux? It’s just an add-on that could be easily replaced by the terminal’s functionality, Ghostty for example can do many of the things that Tmux can
- The main reason I use tmux, is because I don’t want to marry to a specific terminal emulator, yes, I’m using Ghostty right now, but before that I had declared my love to WezTerm, and before that to Kitty, and before that to Alacritty, and before that to iTerm
- So as you can probably see, based on statistics, Ghostty, won’t be the terminal that I’ll end up with for the rest of my life, I don’t want to learn its keybinds, I don’t want to learn how to open tabs, manage sessions (if it has any) or anything else
- All my configuration is managed in Tmux, so I can switch between any of the terminal emulators I mentioned above, and my config will always be the same, my keymaps will be the same, the way of opening tabs and splits will also be the same. And this is what has allowed me to switch between the terminal emulators mentioned above with ease
- And yes, I do understand that tmux adds a bit of a delay because it’s a layer on top of the terminal emulator, but I’ve accepted to live with that for now.
- The best feature that tmux offers me is sessions, I have a session for each one of my different projects (notes, dotfiles, blogpost, docker containers, etc) and that allows me to switch between projects really easily without typing commands or anything, just a keymap and I get to where I want
- This type of workflow of switching between apps and tmux sessions is not something I had thought about in the past,
ThePrimeageninspired this in one of his videos: My Developer Workflow - How I use i3, tmux, and vim - To switch between tmux sessions I’m using Prime’s tmux sessionizer script
- I explain everything in detail in the video below:
- If on macOS, I also use the BetterTouchTool app, which allows me to run hyper+t+j from any app, not just from the terminal itself
- I have a video in which I go over BetterTouchTool in great detail:
- Also remember about this video I had shared above:
- If you don’t know what tmux is or how to set it up and would like to learn all the different things I do with it, check this video out:
Neovim
- This is the tool that I spend most of my day on, it’s the tool I’m editing this current blogpost, and where I edit basically all the different files, it doesn’t matter if it’s something work related or personal
- I have plenty of videos related to Neovim, but if you’re getting started, my personal advise is: Start with something simple, markdown
- I would highly recommend you to check my markdown workflow video, the 2025 version:
Share your tips
- You have cool stuff you want to share that would improve the way my macOS setup looks, or that would improve my workflow, please feel free to share them in the YouTube video comments or in this blogpost as well
Other videos mentioned
Community-driven promotion
Do you want to promote yourself in my channel? I’m not talking about a company like notion, brilliant, and all those other ones we’re using to seeing. I’m talking about you as a person, do you have a project, course, youtube channel or product and trying to reach an audience?
If interested, pricing and all the details can be found in this other page
You’re a fraud, why do you ask for money, isn’t YouTube Ads enough?
- I explain all of this in the “about me page” link below:
- youre-a-fraud-why-do-you-ask-for-money-isnt-youtube-ads-enough
- Above you’ll also find links to my discord, social media, etc
This post is licensed under CC BY 4.0 by the author.
